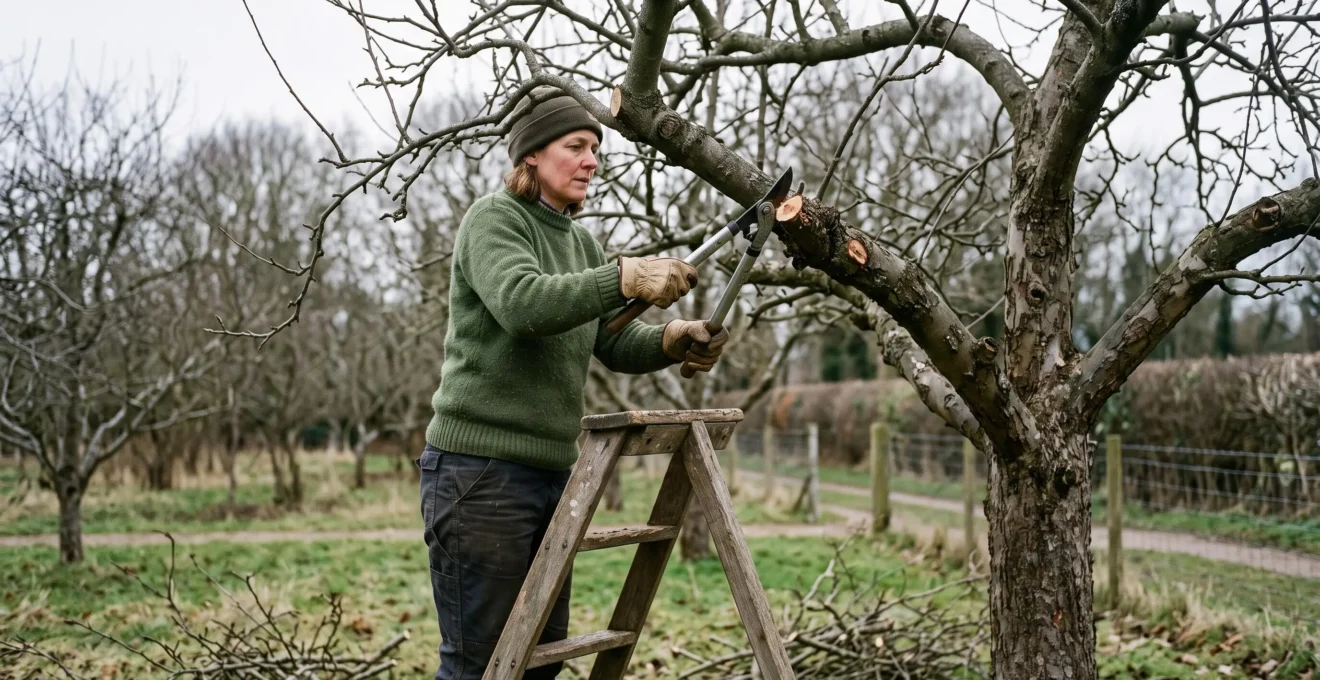
Every pruning cut changes a tree’s future. Remove the tip of a shoot and dormant or developing buds below it may produce new branches. Remove an entire crowded branch and more light can reach the remaining fruiting wood. Cut through the protective tissue at a branch junction, however, and a simple maintenance task may create a lasting weakness.
Strategic pruning means deciding what a cut should achieve before positioning the secateurs. On a young apple tree, that might involve guiding a new branch towards an empty section of the canopy. On an established pear tree, it might mean removing a crossing limb without encouraging a thicket of upright shoots. The same cut can produce different results depending on the tree’s age, vigour, species and season.
For UK gardeners, the most useful skill is learning to predict the response: which bud is likely to grow, which branch should remain, how the wound will close and whether the operation supports future flowering and fruiting. A few accurately placed cuts can be more effective than removing large amounts of wood.
Strategic pruning: the essential principles
- Cut just above a suitably positioned bud to influence the direction of subsequent shoot growth; use thinning cuts to remove unwanted branches altogether.
- Preserve the branch collar when removing limbs, avoid flush cuts and stubs, and limit excessive canopy removal.
- Match pruning season to the species and objective, while giving potentially serious disease symptoms prompt attention.
- Why Should Pruning Cuts Be Made Just Above Buds Facing the Direction You Want Growth?
- How Far Above a Bud Should You Make Pruning Cuts to Prevent Stub Dieback or Bud Damage?
- Heading Cuts vs Thinning Cuts: Which Pruning Technique Achieves Your Desired Plant Shape?
- The Pruning Cut That Prevents Trees Sealing Wounds and Invites Decay Into Trunks
- Should You Make Strategic Pruning Cuts in Winter or Summer for Different Growth Responses?
- The Pruning Delay That Lets Disease Spread from One Branch to Kill Entire Trees
- The Maintenance Timing Error That Removes Next Year’s Flowers or Weakens Tree Health
- Why Does Removing Dead or Diseased Wood Prevent 60% of Tree and Shrub Diseases Spreading?
Why Should Pruning Cuts Be Made Just Above Buds Facing the Direction You Want Growth?
Pruning just above a bud facing the intended growth direction helps determine where the next shoot develops. The uppermost surviving buds commonly respond strongly after a shoot is shortened, so choosing an outward-facing bud can guide growth away from the centre of a tree. The result depends on bud viability, species, shoot vigour and growing conditions.
The underlying mechanism involves apical dominance. An actively growing shoot tip produces hormones, particularly auxin, that influence the development of buds farther down the shoot. Removing that tip changes the hormonal balance, allowing some previously suppressed buds to grow. Cytokinins, carbohydrate availability and other signals also affect which buds respond.
It is inaccurate to imagine that all the sap is redirected into one bud. Several buds may develop, and shoots can change direction as they grow towards light. Nevertheless, bud orientation gives gardeners a useful starting point when shaping a tree.
Before making a heading cut, assess three practical factors:
- Available space: identify an open area where a new branch can develop without crossing an existing limb.
- Sunlight: favour positions that distribute branches throughout the canopy instead of concentrating foliage in an already shaded centre.
- Prevailing wind: consider exposure and likely mechanical stress, especially when training young trees in open UK gardens.
For example, imagine a young apple tree with an empty space on its eastern side. If a suitable bud faces east, shortening a shoot immediately above that bud may encourage a new branch to occupy the gap. The gardener can then reassess the resulting growth the following season.
On an established open-centred tree, outward-facing buds are generally useful because they help keep branches from converging. Inward-facing buds may occasionally be selected when filling a genuine structural gap on a young tree, but this should be deliberate rather than a default method for producing density.
Repeatedly directing shoots inward can create congestion, crossed branches and rubbing surfaces. Those wounds may provide opportunities for some pathogens to enter. A dense canopy also reduces light reaching lower branches, potentially limiting the development of productive fruiting wood.
The University of Minnesota Extension‘s tree and shrub pruning recommendations describe how bud-facing cuts influence subsequent growth and how different pruning cuts affect plant structure.
Once the correct bud has been identified, the distance and angle of the cut become equally important: an accurately chosen bud can still fail if the surrounding stem is damaged.
How Far Above a Bud Should You Make Pruning Cuts to Prevent Stub Dieback or Bud Damage?
On a small shoot, position the pruning cut approximately 5 mm above a healthy bud, adjusting for the shoot’s thickness and the bud’s position. Cutting closer risks damaging or drying out the bud; cutting farther away leaves an unsupported stub that may die back. Make a clean cut without crushing or tearing the surrounding bark.
The 5 mm guideline applies particularly to thin shoots, not every branch diameter. The Royal Horticultural Society explains this distinction in its illustrated tree pruning advice, including why both overly close cuts and unnecessarily long stubs can cause problems.
On a young apple shoot, identify a firm, healthy bud and inspect the short section of wood immediately above it. Place the secateur blade so the remaining wood protects the bud without leaving a conspicuous projection.
A slight slope away from the bud can help prevent moisture sitting immediately against it. Avoid exaggerated angles, however: an excessively steep cut exposes a larger area of wood and may leave insufficient tissue supporting the bud.
Use sharp bypass secateurs for shoots within their rated cutting capacity. Position the cutting blade carefully to minimise crushing on the part of the stem that will remain. On thicker branches, switch to appropriate loppers or a pruning saw rather than forcing small secateurs through the wood.
After pruning, the remaining shoot tissues respond to injury and may form protective barriers around exposed wood. Callus and woundwood can develop around suitable wounds as the tree grows. The process is not dependent on sap flowing into a single bud, and the branch collar belongs to a different situation: removing a whole branch at its junction.
Previous cuts provide useful feedback. Inspect the tree after one growing season:
- A long, darkened stub suggests excessive stem was left beyond the bud, although dieback can also have other causes.
- A dead bud immediately below a cut may indicate that it was damaged, excessively exposed or already unhealthy.
- Split bark or crushed wood suggests the cutting tool was blunt, overloaded or incorrectly positioned.
- A healthy new shoot emerging near the intended position suggests the technique achieved its immediate objective.
Five checks before making a bud-directed pruning cut
- Identify the intended direction of growth and select one suitable living bud; confirm its orientation visually.
- Check whether another branch would obstruct the new shoot; identify a clear growing space.
- Position the secateurs approximately 5 mm above the bud on a thin shoot; confirm that no long stub remains.
- Make a clean, slightly angled cut away from the bud; inspect the finished cut for crushed bark or bud damage.
- Mark the branch on a garden sketch or photograph and compare its new growth with the intended direction next season.
But shortening a shoot is only one type of pruning. When the objective is to reduce congestion rather than encourage branching, removing the shoot at its origin may be more effective.
Heading Cuts vs Thinning Cuts: Which Pruning Technique Achieves Your Desired Plant Shape?
Heading cuts shorten a shoot and commonly encourage new growth from buds below the cut, making them useful for controlled branching and compact shapes. Thinning cuts remove an entire shoot or branch at its origin, usually opening the canopy with less concentrated regrowth. For established fruit trees, selective thinning is often the better option for improving light distribution.
The distinction matters because removing the same amount of wood through different cuts can trigger different responses. A heading cut interrupts the shoot’s existing growth pattern. Several remaining buds may then produce vigorous shoots, especially on a healthy, actively growing tree.
A thinning cut, by contrast, removes the entire unwanted branch rather than leaving a shortened framework that must regenerate. On a mature apple tree, thinning a branch that crosses the centre can improve structural spacing while retaining the growth habits of surrounding limbs.
Choose the technique according to the desired result:
| Pruning objective | Heading cut | Thinning cut |
|---|---|---|
| Encourage branching on a young shoot | Usually appropriate when a strong branching response is wanted | Removes the shoot instead of encouraging its buds |
| Open the centre of a fruit tree | Can stimulate additional congestion | Generally preferred for removing crossing or crowded wood |
| Maintain a clipped hedge or topiary | Useful for developing dense, compact growth | Useful for selectively removing old or congested stems |
| Reduce height without abundant upright regrowth | Severe heading can stimulate watershoots | Selective removal or reduction to an appropriate lateral is often preferable |
| Remove a damaged or badly positioned branch | May retain an unwanted branch framework | Removes the branch at its appropriate point of attachment |
On fruit trees, repeated severe heading can produce vigorous upright shoots known as watershoots. They may shade fruiting wood and create additional pruning work. Dense vegetative growth does not automatically mean a more productive tree: flowering, fruit development and shoot growth compete for the plant’s resources.
For a practical comparison, imagine three plants requiring different treatment. A young apple tree missing a framework branch may benefit from a carefully placed heading cut to encourage a suitably positioned shoot. A mature apple tree with two crossing limbs is more likely to benefit from thinning out the less desirable one. A formally clipped hedge normally requires regular heading cuts to maintain its dense surface.
A shrub rose may require both approaches: removing weak or crossing stems from their bases while shortening selected healthy shoots to suitable buds according to the rose’s pruning group.
These techniques are not mutually exclusive. A gardener can encourage branching on the outside of a young canopy while removing unwanted growth from its centre. The priority is choosing the response before choosing the cut.
Whichever technique is selected, removing a complete branch introduces another critical decision: where to cut at the branch junction without compromising the trunk’s protective tissues.
The Pruning Cut That Prevents Trees Sealing Wounds and Invites Decay Into Trunks
A flush cut made directly against the trunk removes the protective branch collar and can increase the risk of decay entering the parent stem. Leaving a long stub is also harmful because the remaining wood may die back. For substantial branches, use a three-cut removal method and position the final cut just outside the branch collar.
The branch collar is the often-visible swelling where a branch joins a trunk or larger limb. It contains important tissues associated with the tree’s response to injury. Removing it unnecessarily creates a larger and potentially more damaging wound.
Trees do not heal wounds in the same way as human skin. The compartmentalisation model developed by tree pathologist Alex Shigo describes how trees respond to injury by limiting the spread of decay through existing and newly formed protective boundaries. New growth may gradually cover exposed surfaces, but the injured wood is not restored to its original state.
A correctly positioned cut supports this process by preserving the tissues at the branch junction. It does not guarantee that decay will never occur, but it avoids causing unnecessary damage.
When removing a heavy branch, use the following sequence:
- Make an undercut: begin underneath the branch, roughly 20 cm from the intended final cut, to help prevent bark tearing when the branch drops.
- Remove the branch’s weight: make a second cut from above, approximately 2.5 cm farther out along the branch, allowing the outer section to separate without stripping bark down the trunk.
- Remove the remaining stub: make the final cut just outside the branch collar, respecting the natural junction rather than cutting flush against the trunk.
These measurements describe a practical method for certain larger branches, not a universal method for every branch size or loading situation. Heavy, elevated or tensioned limbs can move unpredictably and should be assessed by a qualified tree professional.
Another damaging practice is topping: indiscriminately cutting major limbs back to stubs to reduce a tree’s height. This can encourage numerous weakly attached shoots and expose substantial internal wood to decay. It also destroys much of the tree’s established natural framework.
Routine wound paints and sealing compounds are generally unnecessary. Some products may interfere with normal drying or wound development, while evidence does not support universal use to prevent decay. Particular disease-management situations, including wounds exposed to insect-transmitted pathogens in regions where those pathogens occur, may justify specialist treatment. Such exceptions should not be applied indiscriminately to UK garden trees.
The long-term consequence of poor cuts is not always visible immediately. A tree may continue producing foliage while internal decay progresses behind a damaged junction. This is why a neat-looking surface is less important than preserving the correct anatomical boundary.
Correct cut placement protects structure, but the tree’s response also depends on when that cut is made. Seasonal timing can favour either vigorous regrowth or controlled development.
Should You Make Strategic Pruning Cuts in Winter or Summer for Different Growth Responses?
Winter pruning generally encourages a vigorous spring response because stored reserves support growth from the remaining buds. Summer pruning can restrain excessive vegetative growth by removing active shoots and foliage, although its effects depend on severity and species. Use winter for suitable structural work and summer for carefully timed adjustments rather than applying one calendar to every tree.
A dormant apple tree retains stored energy in its roots, trunk and branches. If some shoots are removed during dormancy, fewer growing points may compete for those reserves when spring growth begins. The surviving buds can therefore produce strong extension shoots, especially after substantial pruning.
During summer, the tree is actively photosynthesising. Removing leafy growth can reduce current energy production, while the timing and intensity of cuts affect how much regrowth follows. Light summer pruning may be helpful when controlling unwanted vigorous shoots, but severe defoliation can weaken the tree.
In UK gardens, pruning dates must also account for disease susceptibility and the age of the wood carrying flowers or fruit. The following framework shows why a single seasonal rule is insufficient.
| Plant or situation | Typical pruning window | Intended response or precaution |
|---|---|---|
| Established apple and pear trees | Winter dormancy for conventional structural pruning; selective summer work when appropriate | Manage framework, remove congestion and balance vegetative growth with fruiting |
| Spring-flowering shrubs on previous-year wood | Shortly after flowering | Preserve flower buds for the following season |
| Plums and cherries (Prunus) | Generally during suitable dry periods in spring or summer in the UK | Reduce exposure to diseases associated with dormant-season pruning |
| Maples and birches | Species-appropriate timing, often after leaf expansion or during suitable late-summer conditions | Reduce conspicuous sap bleeding associated with late-winter cuts |
| Established grapevines | Appropriately timed dormant pruning before strong sap flow, with summer shoot management as needed | Maintain productive framework and avoid excessive late-dormant bleeding |
These windows should be adapted to local conditions. A tree in a sheltered southern English garden may begin active growth earlier than the same species in a colder northern location. Species, cultivar, disease history and training system are more useful than a fixed nationwide date.
Weather also matters. Wet conditions can assist the spread of several plant pathogens, but it would be inaccurate to claim that cool weather always reduces disease risk. Some pathogens are especially problematic in cool, wet periods, while others are favoured by warmth and humidity.
For example, apple and pear trees may be pruned during suitable dormant periods, but active fire blight symptoms demand separate disease-specific decisions. Stone fruits such as cherries and plums require particular care because of their susceptibility to infections associated with pruning wounds.
A sensible long-term programme can separate structural pruning from growth control. Gradual winter framework adjustments may be spread over several years, while selected unwanted shoots can be managed during summer when appropriate.
Yet seasonal preference is not absolute. A branch showing potentially serious infection may require action before the next planned maintenance window.
The Pruning Delay That Lets Disease Spread from One Branch to Kill Entire Trees
Delaying the removal of a genuinely infected branch can allow certain diseases to advance into larger limbs or the trunk, making later treatment more destructive or unsuccessful. Fire blight is one important example affecting apples and pears. However, not every dead or discoloured branch is contagious, and the correct urgency depends on identifying the likely cause.
Fire blight is caused by the bacterium Erwinia amylovora. It can infect susceptible members of the rose family, including apple and pear trees. Symptoms may include wilted shoots, blackened foliage, shoot tips curved into a hook and sunken or cracked cankers. Bacterial ooze may also be visible under favourable conditions.
In susceptible trees, an infection originating on a shoot can progress towards larger branches. Once serious infection reaches the main trunk, removing an isolated branch may no longer be sufficient to save the tree.
The University of Minnesota Extension’s fire blight management recommendations describe cutting infected shoots sufficiently below visible symptoms into healthy wood. The guidance includes disease-specific distances of at least 12 inches (approximately 30 cm) below an infected shoot and at least 8 inches (approximately 20 cm) below visible discolouration associated with cankers on larger branches.
Those distances must not be applied automatically to every fungal canker, dead limb or suspicious mark. Different pathogens spread through different tissues and require different management strategies.
Look for warning signs that justify a prompt assessment:
- Rapid wilting or blackening concentrated on individual shoots.
- Sunken, cracked or oozing cankers accompanied by progressive branch dieback.
- Discoloured bark that appears to expand along a branch.
- Fungal fruiting bodies emerging from the trunk or major structural roots, particularly where stability could be affected.
Fungal fruiting bodies at the base of a substantial tree can indicate internal decay, but they do not automatically mean that pruning away a nearby branch will solve the problem. Where the tree could fall onto people or property, professional assessment is more appropriate than experimental cutting.
Tool hygiene helps limit avoidable transfer of certain pathogens. Remove debris from blades before disinfection, then follow a suitable product’s instructions. A commonly described approach uses at least 70% isopropyl alcohol for small tools, or a correctly prepared household-bleach dilution where appropriate. Alcohol is not equally effective against every pathogen, including in some fire blight situations.
University of Minnesota Extension provides detailed precautions in its gardening tool cleaning and disinfection instructions. Bleach can corrode metal and should never be mixed with incompatible cleaning chemicals. Tools exposed to bleach should be rinsed or otherwise treated according to the product guidance, dried thoroughly and maintained to prevent corrosion.
Disinfection is particularly relevant after working on infected plants and before moving to healthy plants. When infected tissues may have contacted a blade, cleaning and disinfection are sensible precautions. Routine sterilisation between every cut on a healthy tree is not universally required.
The decision to prune outside an ideal seasonal window should be based on evidence of active disease rather than fear alone. A healthy watershoot or an awkward but disease-free branch can usually wait for appropriate maintenance. A rapidly advancing infection may require earlier intervention, ideally following species-specific diagnosis and advice.
Once immediate threats have been assessed, the next challenge is planning non-urgent cuts without sacrificing the flowers and fruit already developing for the following season.
The Maintenance Timing Error That Removes Next Year’s Flowers or Weakens Tree Health
Pruning at the wrong time can remove flower buds that formed during the previous growing season, leaving an otherwise healthy plant with little or no bloom the following year. Excessive repeated pruning can also disrupt the balance between foliage, roots and fruit production. Match the pruning window to when the species forms its flowers and how vigorously it responds to cutting.
The most useful distinction is between plants that flower predominantly on old wood and those that flower on new wood.
Old-wood flowering plants carry buds formed during a previous growing period. Removing those shoots before they bloom removes the flowers with them. By contrast, many new-wood flowering shrubs develop their flowering shoots during the current season and can tolerate pruning before that growth begins, provided the species’ requirements are respected.
Consider these familiar garden plants:
| Plant | Flowering habit | Pruning implication |
|---|---|---|
| Lilac (Syringa) | Flowers principally from buds formed on previous-year growth | Prune shortly after flowering to avoid removing the following season’s buds |
| Climbing hydrangea (Hydrangea anomala subsp. petiolaris) | Flowers on established, previous-season growth | Carry out necessary shaping after flowering and avoid indiscriminate winter cutting |
| Panicle hydrangea (Hydrangea paniculata) | Flowers on current-season growth | Generally suitable for late-winter or early-spring pruning |
| Butterfly bush (Buddleja davidii) | Flowers on new shoots formed during the growing season | Established plants are commonly pruned in spring in the UK |
The approximate distinction between plants flowering before and after 21 June, around the summer solstice, can serve as a memory aid in temperate gardens. It is not a reliable diagnostic rule. Some summer-flowering plants use older wood, and flowering times vary with weather, species and cultivar.
When identification is uncertain, observe where the flower buds are positioned and whether blooms emerge from new shoots or established stems. Recording flowering and pruning dates over two growing seasons creates a more reliable plant-specific reference than a calendar shortcut.
Excessive canopy removal is another avoidable problem. The Royal Horticultural Society’s general tree-pruning guidance recommends avoiding removal of more than one-fifth of a tree’s canopy in a single year. This is a conservative practical guideline for general tree care, not an absolute biological threshold applicable to every fruit-tree training system or restoration project.
Heavy pruning can trigger strong watershoot growth while removing leaves and established fruiting structures. Repeated severe cutting may therefore increase maintenance demands and reduce cropping opportunities, even when the tree initially appears more vigorous.
Some apples and pears also exhibit biennial bearing, producing a heavy crop in one year followed by a lighter crop. The tendency depends on cultivar, weather, flower-bud development and crop load. Poorly timed or excessive pruning can complicate an already uneven cropping pattern.
For susceptible trees, careful fruit thinning, proportionate pruning and maintaining productive wood across different ages may help manage cropping consistency. None of these measures guarantees identical yields every year.
Preserving future flowers is important, but structural and sanitary concerns still take priority when wood is genuinely dead, damaged or infected. That final distinction turns pruning from a purely shaping exercise into a health-management practice.
Key decisions before the final cut
- Determine whether unwanted wood is merely poorly positioned or shows signs of genuine damage or infection; the required response may be different.
- Preserve healthy structural branches and productive shoots wherever possible instead of removing wood simply because it looks untidy.
- Apply sanitary pruning selectively, with attention to pathogen identification, tool cleanliness and safe disposal of infected material.
Why Does Removing Dead or Diseased Wood Prevent 60% of Tree and Shrub Diseases Spreading?
Removing genuinely diseased wood can reduce the amount of infectious material remaining on a tree and may limit the spread of certain pathogens. However, the claim that this practice prevents 60% of tree and shrub diseases from spreading is not supported by the supplied horticultural sources. Its effectiveness varies with the disease, tree species, environment and timing of intervention.
Dead wood and diseased wood should not be treated as identical. A dead branch may be the result of shading, drought, previous physical damage or natural ageing, without containing an actively spreading pathogen. An infected branch, however, may harbour organisms capable of affecting nearby living tissues or other susceptible plants.
Different disease groups illustrate the distinction. Certain canker pathogens colonise bark and living tissues, some decay fungi break down exposed or weakened wood, and diseases such as brown rot caused by Monilinia species can persist in infected fruits and affected plant material.
Removing infectious material can interrupt particular parts of a disease cycle. However, fungi that decompose dead wood are not automatically pathogens of living trees, and removing all dead wood does not eliminate the environmental sources of spores or insects.
The relationship between dead branches and wood-boring insects is similarly complex. Some insects primarily occupy already dead or declining tissues. Others can exploit weakened living wood, while numerous species perform useful ecological functions. A sanitary pruning decision should therefore depend on the tree’s condition and the actual threat, rather than assuming that every dead branch will spread disease.
A practical sanitary pruning protocol has three stages:
- Identify the affected material: inspect branch dieback, cankers, discolouration and other symptoms. Where appropriate for the suspected disease, cut back into sound wood using a disease-specific margin. Do not rely solely on finding pale or white wood, as healthy wood colour varies among species and some infections extend beyond visible damage.
- Reduce contamination: clean cutting surfaces and disinfect tools when working with material likely to contain transmissible pathogens, especially before moving to another tree.
- Remove infectious waste appropriately: collect clearly diseased cuttings and dispose of them according to the pathogen and local guidance. Avoid adding material carrying a significant infectious risk to ordinary garden compost.
Routine deadwood removal should also consider safety. A dead branch overhanging a path, greenhouse or seating area may present a physical hazard regardless of its disease status. Small, accessible dead twigs can often be removed when noticed, but hazardous large branches require suitable equipment and professional expertise.
Some dead wood in low-risk locations contributes to biodiversity by providing habitat for fungi, insects and other wildlife. Its ecological value should be considered alongside safety, appearance and plant health rather than assuming complete removal is always beneficial.
For structural pruning, the order of work is straightforward: inspect the plant, address hazardous or genuinely diseased material where appropriate, then assess crossing branches, light penetration and desired growth direction. This avoids shaping a canopy around branches that may later need removal.
Even sanitary pruning does not cure every infection. Diseases affecting roots, the main trunk or systemic tissues may remain after visible branches are removed. Repeated dieback, extensive cankers or major structural decay warrants further diagnosis rather than progressively cutting the tree back.
At the next pruning session, begin with a deliberate inspection: identify hazardous or diseased branches, decide which healthy growth deserves protection, choose the appropriate cutting technique and record the results. Reviewing the tree after each growing season is the most practical way to refine cuts that influence its shape and fruiting over the years ahead.
Can one pruning cut permanently change the shape of a fruit tree?
A single cut can influence which buds develop or remove an entire structural branch, producing a lasting change in the framework. It does not permanently determine every subsequent shoot. Continued growth, weather, disease and future pruning all affect the outcome. Long-term shape is usually created through successive, carefully assessed interventions.
Is it better to remove a crowded branch or shorten it?
Removing the whole branch is usually preferable when the objective is to eliminate crossing growth or open a congested canopy. Shortening it may stimulate additional shoots beneath the cut. However, when a branch can be redirected to a suitable lateral shoot or bud without creating congestion, selective shortening may preserve useful structure.
Should pruning wounds be covered with tree wound sealant?
Routine wound sealants are generally unnecessary for properly made pruning cuts. Trees respond to wounds through compartmentalisation and new tissue growth. Specialised disease-control circumstances may require additional protection, but products should only be used when supported by advice relevant to the species and pathogen.
How can you tell whether an old pruning cut was made correctly?
Inspect the remaining bud or branch junction, look for unnecessary stubs, and check whether bark was torn or crushed. Around an older branch-removal wound, developing woundwood may indicate normal closure. Darkening alone does not prove an incorrect cut, and progressive decay or dieback should be assessed in the context of the tree’s overall health.
Can an over-pruned fruit tree recover and produce fruit again?
Many otherwise healthy fruit trees can recover from excessive pruning, but the outcome depends on the species, age, severity of damage and remaining structure. Avoid repeated severe cutting, retain healthy foliage and appropriately positioned shoots, and allow time for productive wood to develop. A badly damaged framework or extensive decay may limit recovery even when vigorous new shoots appear.