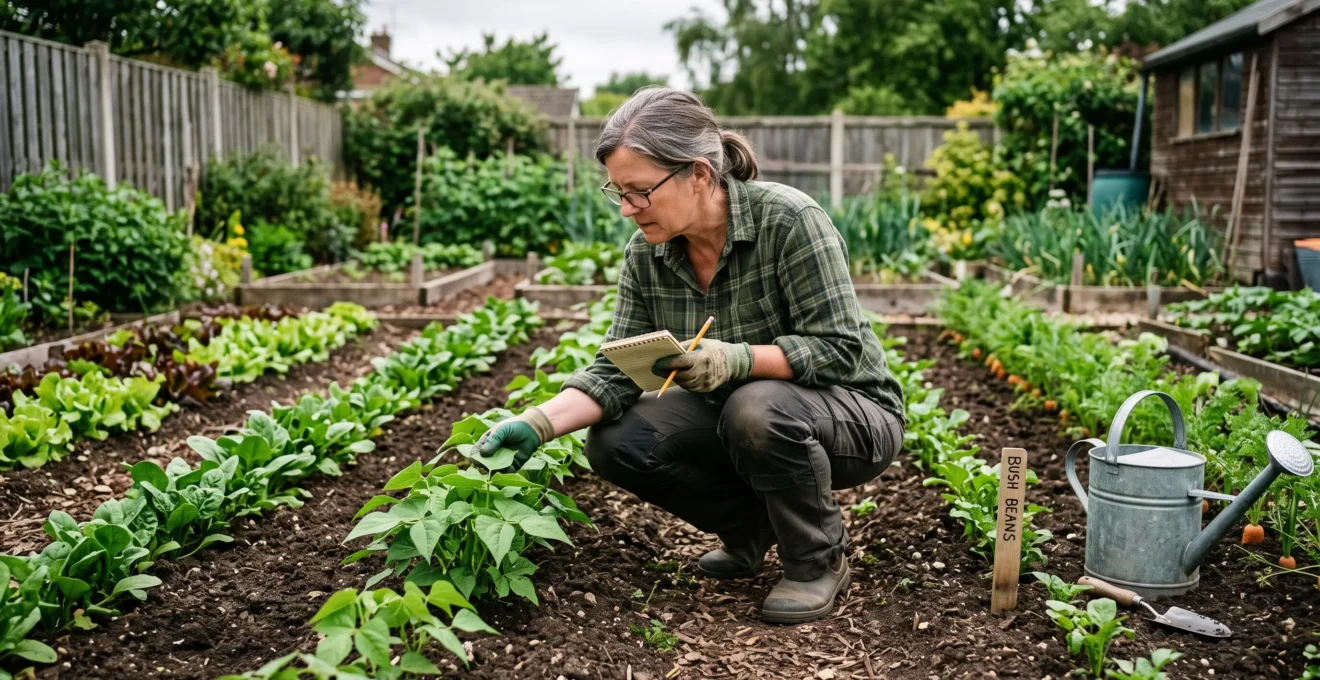
A vegetable crop rarely deteriorates without warning. Aphids settle beneath young leaves, roots struggle in saturated soil, and nutrient problems begin changing foliage before the whole plant looks unhealthy. The difficulty is recognising those signals while there is still time to respond.
Weekly crop monitoring creates a repeatable early-warning system by combining plant inspections, soil checks, pest counts and dated observations. During periods of rapid pest development, vulnerable crops may need checking twice a week or more. The purpose is not to inspect every leaf every day, but to notice meaningful changes before they become widespread.
Can this prevent 80% of harvest losses? That precise figure is not established by the available agricultural guidance. Monitoring can reduce avoidable damage through earlier detection and better intervention decisions, but the proportion of harvest saved depends on the crop, pest, weather, disease and timing.
The practical advantage is straightforward: a few aphids, an emerging moisture problem or a newly discoloured leaf usually offers more management options than a severely damaged bed.
Crop monitoring essentials
- Inspect vegetable beds at least weekly as a starting routine, increasing frequency during vulnerable growth stages and active pest outbreaks.
- Check leaf undersides, growing tips, stems and root-zone moisture rather than judging plants from above.
- Record changes over time and investigate their causes before applying fertiliser, pesticides or additional water.
- Why Leaf Colour and Pattern Changes Signal Nutrient Problems Weeks Before Growth Stops
- How Often Should You Inspect Vegetable Crops to Catch Pest Outbreaks at Controllable Stages?
- Sticky Traps vs Visual Counts: Which Monitoring Method Gives Accurate Pest Population Data?
- The Inspection Shortcut That Misses Pest Colonies Until They’ve Already Damaged Crops
- When Should You Begin Crop Monitoring Records to Identify Slow-Developing Problems?
- How to Tell If Wilting Is from Drought, Overwatering, or Root Disease?
- How to Identify Plant Stress Symptoms That Warn of Problems 1-2 Weeks Before Visible Damage?
- How to Spot the First Aphid Scouts That Signal Intervention Needed Within Days?
Why Leaf Colour and Pattern Changes Signal Nutrient Problems Weeks Before Growth Stops
Leaf colour changes can reveal disrupted nutrient supply before severe growth restriction becomes obvious. Their diagnostic value comes from combining the pattern of discolouration with the age of affected leaves. However, no reliable universal two- or three-week warning period exists: symptoms develop at different rates depending on the crop, nutrient, soil and growing conditions.
Chlorophyll gives healthy leaves their green colour and enables photosynthesis. When nutrient supply interferes with chlorophyll formation or maintenance, yellowing may develop. Some nutrients can be redistributed from older foliage into new growth, while others have limited mobility within the plant.
This distinction provides a useful first diagnostic question: which leaves changed colour first?
Nitrogen and magnesium are relatively mobile nutrients. When their supply becomes inadequate, older leaves commonly show symptoms first because the plant reallocates available nutrients towards younger tissues.
Iron deficiency, by contrast, frequently appears in younger foliage. Calcium deficiency can damage developing tissues, including growing points and fruits, rather than producing a simple, uniform yellowing pattern.
The following patterns help narrow the possibilities.
| Visible pattern | Possible cause | First diagnostic check |
|---|---|---|
| Uniform yellowing, especially older leaves | Nitrogen deficiency | Review soil fertility, root condition and recent heavy rainfall |
| Yellowing between green veins on older leaves | Magnesium deficiency | Check leaf age and soil nutrient conditions |
| Yellowing between veins on young leaves | Iron availability problem | Investigate soil pH, drainage and root aeration |
| Purple or reddish foliage with poor growth | Possible phosphorus deficiency | Consider soil temperature and nutrient availability |
| Brown or scorched leaf margins | Possible potassium deficiency | Check watering, salinity and soil nutrient status |
| Damaged growing points or blossom-end rot | Possible calcium supply or transport problem | Review moisture consistency and root function |
These patterns are diagnostic clues, not proof. Cold soil, compacted roots, excess water, disease and pest feeding can produce overlapping symptoms. Applying fertiliser simply because leaves turn yellow can waste nutrients and potentially aggravate the underlying problem.
Utah State University Extension‘s nutrient management guidance explains the relationship between nutrient mobility, deficiency symptoms and soil testing.
Before correcting a suspected deficiency, inspect the roots where practical, examine affected leaves for insects and check the recent watering pattern. Where uncertainty remains, a suitable soil test or plant tissue analysis can provide stronger evidence.
Correction also takes time. A soil amendment may not immediately become available to roots, particularly when temperature, moisture or soil chemistry restrict nutrient uptake. Existing damaged foliage may never return to its original appearance, even after the cause is corrected.
The earlier these changes enter your inspection notes, the easier it becomes to distinguish an isolated symptom from a developing problem. That makes inspection frequency the next important decision.
How Often Should You Inspect Vegetable Crops to Catch Pest Outbreaks at Controllable Stages?
Inspect established vegetable crops weekly as a practical baseline, but increase checks to twice weekly or more when seedlings are vulnerable, pest activity is rising or conditions favour rapid reproduction. A brief daily scan can supplement these inspections. The right interval depends on crop development, weather and the biology of the pests being monitored.
A weekly inspection is not equivalent to looking across the vegetable plot while watering. A proper scouting walk examines plant parts where pests settle and records enough detail to recognise changes.
In a UK vegetable garden, inspection frequency should respond to seasonal conditions rather than follow an inflexible calendar.
| Growing conditions | Suggested frequency | Priority |
|---|---|---|
| Established crops with little pest activity | Weekly full inspection | Compare growth, foliage and pest counts |
| Seedlings and young transplants | At least twice weekly | Check vulnerable growing points and soil moisture |
| Active aphid or whitefly colonies | Every 1–3 days as needed | Track population growth and beneficial insects |
| Flowering and fruit development | Weekly, with extra checks when risks increase | Monitor water stress, flowers and developing fruit |
| After heavy rain or prolonged wet conditions | Additional inspection when accessible | Check waterlogging, slug activity and disease symptoms |
These are practical scheduling suggestions, not universal research-validated intervals. A crop already showing rapid deterioration requires immediate assessment rather than waiting for its next scheduled inspection.
The distinction between a full inspection and a quick scan makes the routine manageable.
- Two-minute scan: look for unexpected wilting, discolouration, damaged leaves, unusual insect activity and obvious differences between neighbouring plants.
- Full inspection: turn leaves over, examine growing tips and stem junctions, inspect developing produce, check soil moisture and record pest activity.
Pest development explains why these intervals matter. Under favourable conditions, some aphids can complete a generation in approximately seven to eight days. A colony that is barely noticeable at one inspection may be considerably larger by the next.
7–8 days
A possible aphid generation time under favourable conditions for species covered by Utah State University’s guidance. This is not a universal development rate.
Utah State University Extension, Aphid Pests of Vegetables, 2017.
Young plants deserve particular attention because damage to limited foliage can affect a substantial proportion of their growing capacity. Flowering and fruit-setting crops also require closer moisture monitoring when conditions change.
After fertilising, look for unexpected leaf scorch or changes in growth rather than assuming a feeding application has worked. After rain, examine drainage and vulnerable foliage, especially where plants remain crowded and wet.
Once the schedule is established, the next challenge is deciding how to measure what you find. A trap full of insects and a leaf covered in feeding pests do not represent the same kind of evidence.
Sticky Traps vs Visual Counts: Which Monitoring Method Gives Accurate Pest Population Data?
Sticky traps measure insects captured while moving through a monitored area, whereas visual counts measure pests actually present on plants. Neither method is universally more accurate. Sticky traps are useful for detecting certain flying arrivals and changes in activity; direct inspection is more informative when assessing settled colonies, feeding damage and whether intervention is necessary.
A yellow sticky card may catch winged aphids, whiteflies and other small flying insects. Its catches indicate activity near the trap, not necessarily the number feeding on nearby vegetables.
Visual inspection provides different information. Counting aphids on selected leaves, for example, shows whether colonies are establishing, expanding or declining.
Neither approach should be interpreted without considering the pest species and crop.
| Monitoring need | Sticky traps | Visual counts |
|---|---|---|
| Winged aphid arrivals | Useful early detection | Confirm settlement on plants |
| Adult whitefly activity | Useful for trends | Check adults and immature stages on leaves |
| Fungus gnat adults | Useful around seedlings and protected growing areas | Inspect growing medium and root condition for associated problems |
| Caterpillar eggs and larvae | Ordinary sticky cards are generally unsuitable | Inspect leaves and feeding damage |
| Slugs and snails | Unsuitable | Look for feeding damage and inspect hiding places |
| Scale insects | Limited usefulness for some mobile stages | Examine stems and leaves directly |
Species-specific pheromone traps are another option for certain moth pests. They are designed to monitor targeted adult activity and should not be confused with ordinary yellow sticky cards.
Repeated measurements are more informative than isolated counts. A single trap catch cannot establish whether pest pressure is increasing. Likewise, counting insects on one heavily affected leaf may exaggerate the condition of an entire bed.
For consistent comparisons, keep trap placement, exposure time and the number of sampled plants reasonably stable.
| Inspection | Winged insects per trap | Aphids on five sampled plants | Interpretation |
|---|---|---|---|
| Week 1 | 3 | 2 | Low observed activity |
| Week 2 | 9 | 7 | Both measures rising |
| Week 3 | 6 | 15 | Fewer trap catches but more settled aphids |
This fictional example illustrates why trap and plant counts should remain separate. A declining trap catch does not prove that an established colony is shrinking.
Traps can also attract insects from outside the crop, while visual counts can miss insects hidden beneath leaves. Sticky cards may catch beneficial insects as well, so placement and use should be considered carefully.
Utah State University’s vegetable pest monitoring instructions describe direct scouting, sampling equipment, insect counts and the use of monitoring traps.
Choose the method according to the question. To detect incoming winged pests, a trap may help. To determine whether insects are feeding on cabbages, beans or tomatoes, inspect the plants themselves.
Even carefully maintained counts become misleading when the inspection itself overlooks the places where colonies develop. That is why the physical technique matters as much as the monitoring equipment.
The Inspection Shortcut That Misses Pest Colonies Until They’ve Already Damaged Crops
The most damaging inspection shortcut is walking past vegetable plants while looking only at their upper leaves and general appearance. Aphids, whiteflies and other pests may establish colonies beneath foliage or around growing points long before the whole plant looks unhealthy. A quick lift-and-tilt inspection reveals problems that a top-down glance can miss.
The upper surface of a leaf provides only a partial picture of pest activity. Leaf undersides offer sheltered feeding and reproductive sites for many small insects, including aphids and whiteflies.
Growing tips, flower buds and stem junctions also deserve attention because tender plant tissues can attract feeding insects.
When a gardener waits for curled leaves, widespread yellowing or obvious stunting, the pest population may already have expanded beyond its earliest, most manageable stage.
A practical alternative is the lift-and-tilt technique:
- Choose plants from different positions in the bed rather than inspecting only those nearest the path.
- Lift a young leaf gently and examine its underside.
- Check the growing tip and where leaves join the stem.
- Look for insects, eggs, honeydew, unusual marks and beneficial organisms.
- Move to another plant and repeat, recording significant findings.
Use a hand lens when insects are too small to identify confidently. Inspecting a representative selection of plants is more useful than repeatedly examining the same convenient specimen.
Some pests create problems beyond the immediate loss of plant sap. Certain aphid species transmit plant viruses, while honeydew can attract ants that protect colonies from natural enemies.
Not every small colony requires chemical treatment. The important distinction is between detecting insects and determining whether their numbers, associated damage or disease risk justify intervention.
During a more thorough weekly inspection, choose a few sentinel plants from vulnerable locations, such as the edge of a bed or an area where pests appeared previously. Examine these more closely while still sampling other plants across the crop.
Sentinel plants are useful for continuity, but they should not become the only plants inspected. A colony may establish elsewhere, especially when pest arrivals are uneven.
Once hidden colonies are included in the routine, written observations can reveal whether a problem is new, recurring or developing slowly across several weeks.
When Should You Begin Crop Monitoring Records to Identify Slow-Developing Problems?
Begin crop monitoring records before sowing or transplanting. Record the bed, crop variety, planting date, initial soil conditions and recent weather so later changes have a meaningful baseline. Waiting until symptoms appear removes valuable context, particularly for gradual nutrient problems, poor drainage and recurring pest activity.
A record becomes useful when it answers three questions: what changed, when did it change, and what conditions preceded it?
A photograph of yellowing leaves may show the symptom clearly, but without the crop age, watering history and earlier observations, it may reveal little about the cause.
For each bed, note the crop and variety, sowing or transplanting date, growth stage, recent rainfall or irrigation, leaf condition and any pests or beneficial insects observed.
Keep the format simple enough to maintain throughout the season. A notebook, printed sheet or basic spreadsheet is sufficient.
| Date and bed | Crop stage | Observations | Next action |
|---|---|---|---|
| 6 May, Bed A | Young transplants | Leaves green; soil moist; no aphids seen | Recheck in three days |
| 9 May, Bed A | New growth | Three aphids on one growing tip | Inspect nearby plants and natural enemies |
| 12 May, Bed A | Active growth | Aphids on several leaves; soil still moist | Assess population trend and appropriate control |
These entries are hypothetical and demonstrate a record structure rather than results from a real garden.
Short symbols can speed up recording. For example, a gardener might use M for moist soil, D for dry soil, A for aphids and Y for yellowing. Define the symbols once so they remain understandable later.
Build your five-step crop monitoring routine
- Map your growing beds. Produce a labelled sketch showing each crop and variety.
- Record the starting conditions. Create a dated baseline entry covering planting, soil condition and recent weather.
- Inspect representative plants. Complete a record of leaf condition, growing tips, pest observations and soil moisture.
- Compare each inspection with the previous one. Mark whether symptoms or pest counts are rising, stable or falling.
- Write down the next decision. Finish each entry with a specific action or reinspection date.
Records become especially valuable across growing seasons. If a particular bed repeatedly develops poor growth after wet weather, drainage or soil structure deserves investigation. If the same crop attracts pests at a similar stage each year, monitoring can begin earlier the following season.
These observations may inform crop rotation, variety selection and planting schedules, although repeated patterns do not automatically prove a particular cause.
One of the most valuable uses of those records is interpreting wilting correctly, because visually similar drooping leaves can result from completely different root-zone conditions.
How to Tell If Wilting Is from Drought, Overwatering, or Root Disease?
Check soil moisture at the active root depth before watering a wilted vegetable plant. Dry soil suggests insufficient water, while persistently saturated soil raises concern about poor aeration or root damage. Root disease becomes more likely when wilting continues despite suitable moisture and other symptoms develop. Leaf posture alone cannot reliably distinguish these causes.
Wilting occurs when leaves lose sufficient internal water pressure to remain firm. This can happen because water is unavailable in the soil, because roots cannot absorb it effectively, or because water loss through leaves temporarily exceeds uptake.
That explains why adding water is not always the correct response.
Begin by examining the soil below the dry-looking surface. A finger test can provide a rough indication in a small container, but larger beds may require a trowel or soil moisture probe to assess conditions where active roots are growing.
Interpret the findings alongside the plant’s recent watering and weather history.
| Possible cause | Typical clues | Appropriate first response |
|---|---|---|
| Drought stress | Dry root-zone soil, drooping foliage and possible recovery after adequate watering | Water according to root-zone needs and reassess |
| Waterlogging | Persistently wet soil, poor drainage and sometimes yellowing lower leaves | Stop unnecessary irrigation and investigate drainage |
| Root disease | Persistent wilt, declining vigour and potentially discoloured or decaying roots | Investigate root condition and identify the cause before treatment |
| Temporary heat-related wilt | Drooping during hot periods followed by recovery as conditions cool | Check moisture and recovery before adding water |
Waterlogged roots can become oxygen-starved. Even though the surrounding soil contains abundant water, impaired roots may be unable to absorb enough to support the leaves.
Root diseases can produce similar symptoms. Brown or mushy roots may strengthen suspicion of decay, but root appearance alone does not identify the responsible pathogen. Some diseases also occur in soil that is not obviously saturated.
Temporary midday wilting requires careful interpretation. On hot, bright or windy days, transpiration can exceed water uptake for part of the afternoon. A plant that recovers as conditions cool may not need additional irrigation, provided root-zone moisture is adequate.
However, repeated or worsening midday wilt can still indicate inadequate water supply or impaired root function.
Utah State University Extension’s vegetable irrigation recommendations explain how rooting depth, soil texture, crop development and weather influence irrigation requirements.
For UK gardeners, rainfall should never be assumed to have watered the root zone adequately. Dense foliage, containers, raised beds and different soil textures can produce very different moisture conditions within the same garden.
Once moisture problems are considered, smaller changes in growth rate, leaf posture and flowering can help identify stress before severe symptoms dominate the plant.
How to Identify Plant Stress Symptoms That Warn of Problems 1-2 Weeks Before Visible Damage?
Early plant stress may appear as slower growth, smaller new leaves, subtle changes in leaf angle or delayed flowering before widespread damage becomes obvious. Compare plants of the same variety and age, then check soil moisture, nutrient-related leaf patterns and pest activity. The warning period varies: some problems develop within days, while others progress over several weeks.
The strongest early-warning signal is often a change from the plant’s normal growth pattern rather than one dramatic symptom.
For example, two neighbouring bean plants may have similar colour, but one produces noticeably smaller new leaves. That difference deserves investigation even if neither plant looks severely damaged.
Comparisons work best between plants growing under similar conditions. Differences in variety, planting date, light exposure or available root space can otherwise create misleading contrasts.
Train your attention on four categories of subtle change:
- Growth rate: new leaves emerge more slowly or remain smaller than expected.
- Leaf posture: foliage begins to droop, twist or change angle.
- Colour development: new or older leaves show faint yellowing, purpling or marginal discolouration.
- Reproductive development: flowering is delayed or flowers and young fruits develop poorly.
These signs are not specific diagnoses. They become useful when paired with checks that distinguish water stress, nutritional problems and biological attack.
| Suspected problem | First check | Second check |
|---|---|---|
| Water stress | Assess root-zone moisture | Review rainfall, irrigation and drainage |
| Nutrient-related stress | Identify affected leaf age and colour pattern | Assess soil conditions and consider appropriate testing |
| Pest or disease attack | Inspect leaf undersides, growing tips and stems | Look for insects, lesions, spread and affected neighbouring plants |
The commonly suggested one- to two-week warning window should not be treated as a guaranteed opportunity to save a crop. Aphid populations can increase rapidly, while nutrient limitations may develop gradually. Some plant diseases progress quickly, and certain infections can spread before obvious symptoms appear.
Temperature further changes the timeline. Warm conditions may accelerate insect reproduction and plant development, while cool soil can slow root activity and nutrient uptake.
A practical way to recognise these differences is to photograph the same plant from a similar position during successive inspections. The photographs should supplement, not replace, dated notes about weather, moisture and pests.
When symptoms are subtle, avoid making several treatments at once. Changing watering, feeding and pest control simultaneously makes it harder to identify what caused the problem or which intervention helped.
Among the fastest-developing threats worth watching are aphid colonies. Recognising their first arrivals allows a gardener to assess the situation while the infestation is still localised.
Key takeaways before acting on aphids
- A pest sighting is a reason to inspect more closely, not automatically a reason to spray.
- Small, localised colonies offer more targeted management options than widespread infestations.
- Natural enemies, plant vulnerability and potential virus transmission all influence the urgency of intervention.
How to Spot the First Aphid Scouts That Signal Intervention Needed Within Days?
Look for winged aphids and small developing colonies on tender growing tips, flower buds and the undersides of young leaves. Check vulnerable plants frequently from spring onwards, especially when conditions favour aphid reproduction. Finding a few arrivals should trigger closer monitoring and assessment, not automatic spraying, because beneficial insects may already be limiting the population.
Winged aphids can move between host plants and establish new colonies. During favourable growing conditions, some aphid species reproduce without mating and give birth to live young, allowing numbers to increase rapidly.
Utah State University’s vegetable aphid guidance reports that certain species can complete a generation in as little as seven to eight days under favourable conditions. It also recommends scouting young, rapidly growing plants at least twice weekly.
For a UK gardener, the exact period of greatest activity depends on the aphid species, host crop and seasonal weather. Tender growth should receive particular attention whenever aphids are active.
Check the following locations:
- Young leaves and their undersides, where colonies may be concealed.
- Growing tips and flower buds, where tender tissues can attract feeding aphids.
- Stem junctions, particularly on heavily branched plants.
- Leaves showing early curling, distortion or sticky honeydew.
- Stems with ants repeatedly travelling towards young growth.
Ant activity can be an indirect clue because ants may feed on aphid honeydew and protect colonies from predators. However, ants alone do not prove that aphids are present.
Count the aphids and assess their distribution. A few insects on one shoot present a different management situation from expanding colonies across numerous plants.
For a small, accessible colony, physically removing aphids or using a suitable water spray may be sufficient, provided the plant can tolerate the treatment. Repeat inspections are necessary to establish whether the population is actually declining.
Before intervening, look for ladybird larvae, lacewing larvae, hoverfly larvae and parasitised aphids. These natural enemies can suppress populations, and unnecessary broad-spectrum pesticide use may harm them.
Biological control is not always fast enough to prevent virus transmission, however. Certain aphid-transmitted viruses can spread before a large colony develops, making crop-specific risk assessment important.
There is no universal number of aphids that automatically requires treatment across all vegetables. Thresholds depend on the species, crop, growth stage and type of damage. For pesticide use, follow current UK authorisations and product labels rather than transferring overseas recommendations directly.
At the next garden visit, choose one vulnerable bed, inspect the undersides of young leaves, count any aphids and note whether natural enemies are present. Record the result and set a reinspection date. That small, repeatable decision is the foundation of crop monitoring that prevents manageable problems from being overlooked.
Can weekly crop monitoring guarantee an 80% reduction in harvest losses?
No. The available sources support systematic monitoring as a way to detect problems and inform timely management, but they do not establish an 80% reduction in harvest losses. Results depend on the crop, growing conditions, pest or disease involved, and whether effective interventions remain possible.
What basic equipment is useful for monitoring a small vegetable garden?
A notebook or simple digital log, a hand lens, a trowel for checking soil moisture and a phone for consistent photographs cover many routine needs. Sticky cards or pest-specific traps can be added when they answer a particular monitoring question.
Should vegetable plants be inspected immediately after heavy rainfall?
An additional inspection is useful once conditions are safe and plants can be examined without damaging wet soil. Check drainage, persistent leaf wetness, slug feeding and signs of root-zone saturation. Rainfall alone does not prove that disease or pest damage will develop.
How many plants should be inspected in each vegetable bed?
There is no single sample size suitable for every home garden. Inspect plants from different parts of the bed, include vulnerable or previously affected locations, and keep the sampling method consistent enough to compare observations over time. Increase coverage when symptoms are uneven or pest activity rises.
When should monitoring lead to treatment rather than continued observation?
Consider intervention when the problem is identified with reasonable confidence, damage or population trends justify action, and a suitable control is available. Account for plant age, crop sensitivity, natural enemies and disease transmission risk. Avoid treating an unidentified symptom simply because it looks alarming.