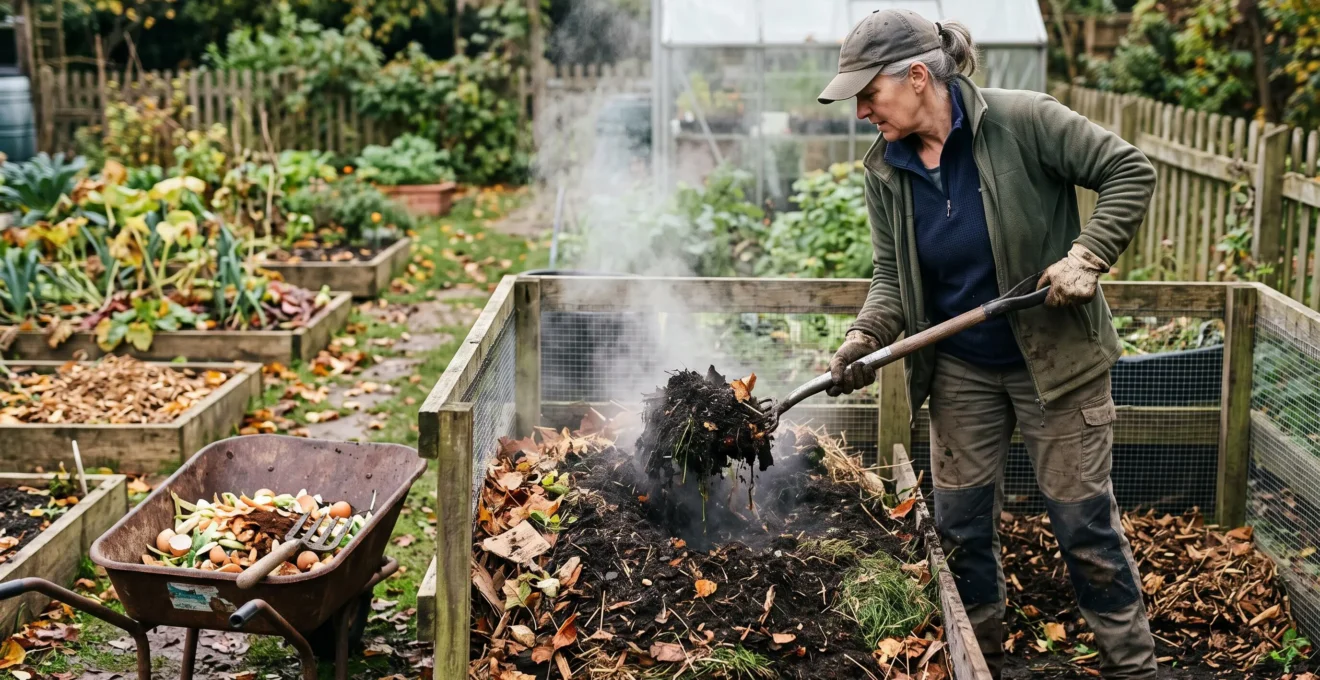
Producing genuinely effective compost is about more than allowing garden waste to rot. High-quality compost depends on the materials entering the pile, the balance between carbon and nitrogen, moisture, oxygen, temperature and, crucially, sufficient curing time. When these factors are managed, a gardener can produce a consistent soil amendment that improves soil structure, supports biological activity and contributes valuable organic matter.
Homemade compost does not automatically contain more nutrients than every bagged alternative. Commercial products vary considerably in their feedstocks, maturity and composition, just as homemade batches do. The real advantage of producing compost on-site is control: the gardener knows what went into the pile, can adjust the process and can test questionable batches before applying them to valuable vegetable beds.
For UK gardens, this approach also makes practical use of autumn leaves, grass clippings, kitchen scraps and seasonal pruning. The objective is not simply to eliminate waste, but to turn suitable organic materials into a stable amendment that matches the needs of the soil.
What makes compost genuinely nutrient-rich?
- Balance carbon-rich browns and nitrogen-rich greens, then regulate moisture and airflow to support efficient decomposition.
- Separate fresh, active and curing material so compost reaches maturity before it is used around plants.
- Protect batches from persistent herbicides, seeded weeds and contaminated inputs, and test questionable material before garden application.
- Why Does the Brown-to-Green Ratio Control Whether Compost Becomes Rich Soil or Smelly Sludge?
- How to Build a Three-Bay Compost System for Year-Round Nutrient-Rich Production?
- Hot Fast Composting vs Cold Slow Composting: Which Produces Superior Nutrient-Rich Results?
- The Compost Ingredient That Ruins Entire Batches and Spreads Weeds Across Your Garden
- When Is Compost Truly Finished and Ready to Use Without Harming Plant Growth?
- Why Do Self-Sustaining Gardens Compost Everything On-Site Instead of Removing Organic Waste?
- Why Does Well-Rotted Manure Feed Plants Faster Than Leaf Mould Despite Both Being Organic?
- How Can You Create a Self-Sustaining Cycle That Eliminates the Need for External Inputs?
Why Does the Brown-to-Green Ratio Control Whether Compost Becomes Rich Soil or Smelly Sludge?
The brown-to-green balance determines whether composting microorganisms have enough carbon for energy and nitrogen for growth. Too much nitrogen-rich material can produce unpleasant ammonia-like smells, while excessive dry carbon slows decomposition. A balanced mixture supports active microbial processing, helping retain nitrogen in the finished compost rather than losing it through poor management.
Brown materials include dry leaves, straw, shredded untreated cardboard and small woody fragments. They supply carbon, which microorganisms use as an energy source. Green materials include grass clippings, fresh plant residues and vegetable scraps; they contribute nitrogen needed for microbial growth and reproduction. Water and oxygen are equally important: even a well-balanced mixture will decompose poorly if it becomes waterlogged or compacted.
The EPA guidance on composting processes and carbon-to-nitrogen balance recommends approximately three parts browns to one part greens by volume. This is a useful starting point, not a universal recipe. Different materials contain different amounts of moisture and nutrients, so the actual behaviour of the pile matters more than blindly following a fixed ratio.
For a home gardener without scales, begin by adding roughly three containers of loose browns for every container of fresh greens. Mix the materials rather than compressing them into dense layers. Check the pile over the following week: a rising temperature, a damp but not saturated texture and progressive decomposition indicate that the mixture is functioning.
Smell and texture provide practical diagnostic signals. A strong ammonia smell suggests excess nitrogen or inadequate aeration. Add dry leaves, shredded cardboard or straw, then turn the material to introduce oxygen. A sour, rotten smell often indicates excessive moisture and poor airflow; combine turning with dry browns rather than simply adding more greens.
Conversely, a pile that remains dry and inactive may need water and additional nitrogen-rich material. Aim for the feel of a wrung-out sponge. If the material is dusty, moisten it gradually; if water runs freely when squeezed, add dry structural material and improve airflow.
3:1
The EPA’s approximate volume guideline for carbon-rich browns to nitrogen-rich greens. Feedstock composition and moisture determine whether adjustments are needed.
United States Environmental Protection Agency, composting guidance.
Temperature is another useful signal. A warming pile indicates microbial activity, but a cold pile does not necessarily mean failure: it may be too small, too dry or dominated by slowly decomposing woody material. Adjust the ingredients and conditions together rather than treating temperature as the only measure of quality.
The objective is not to produce the hottest possible pile at any cost. It is to maintain conditions that decompose organic matter efficiently while retaining nutrients. Excessive aeration, poor moisture management and unsuitable ingredients can all undermine that objective.
Once the mixture is balanced, the next challenge is maintaining production without mixing fresh scraps into compost that is already approaching maturity. A properly organised system makes that separation much easier.
How to Build a Three-Bay Compost System for Year-Round Nutrient-Rich Production?
A three-bay compost system separates fresh inputs, actively decomposing material and compost that is curing or ready for use. This simple production arrangement prevents new kitchen and garden waste from disrupting an older batch. It also makes it easier to manage turning, monitor progress and maintain a continuous supply of mature compost throughout the gardening year.
The first bay receives fresh material: grass clippings, vegetable scraps, leaves and suitable plant residues. The second contains a batch undergoing active decomposition, where moisture, airflow and temperature need attention. The third holds material that has completed its main decomposition stage and is resting before application.
This arrangement is recognised in the EPA’s description of three-bin composting systems, where each container holds material at a different processing stage. The practical benefit is operational: fresh waste can continue entering the system while older compost finishes without being repeatedly disturbed.
Construction should reflect the amount of organic material produced by the garden. A small household garden may need relatively compact bays, while a productive vegetable garden with substantial seasonal green waste requires more capacity. Timber pallets can provide an accessible structure, provided they are suitable for garden use and do not introduce unwanted chemical contamination. Untreated timber and suitable masonry are alternatives.
Leave sufficient openings or gaps for air circulation, while keeping the structure stable enough to retain the material. Choose a position with convenient access to garden waste and water. Good drainage matters: the base should not become a permanent pool of water, but the pile should remain moist enough for microorganisms to function.
The transfer routine is the heart of the system. When a fresh bay has accumulated enough material, transfer and mix it into the active bay if the batch is large enough and the ingredients are suitable. During hot composting, turning moves material from the cooler outside towards the centre, improving exposure to heat and oxygen.
Oregon State University Extension describes approximately one cubic yard (around 3 feet by 3 feet by 3 feet) as a practical starting volume for fast hot composting. Smaller piles can still compost, but they may struggle to retain enough heat for the same process. The pile also needs adequate moisture and nitrogen-rich ingredients.
Seasonal planning makes the arrangement more effective in the UK. Autumn often produces a surplus of fallen leaves, which can be stored dry for use when spring grass clippings and kitchen waste increase nitrogen input. Keep a covered supply of browns available rather than allowing the active pile to become dominated by wet greens.
The third bay should not become a permanent dumping area. Its purpose is to protect the curing batch from fresh additions and provide a buffer between production and application. If the material is still decomposing actively, allow it to rest rather than spreading it prematurely.
Build and operate a reliable three-bay compost system
- Measure the garden’s organic waste output over a typical week and record the estimated volume needed for each bay.
- Choose a well-drained, accessible location and document the construction materials and dimensions.
- Label the bays Fresh, Active and Curing so each batch has a clearly defined stage.
- Keep a separate dry-browns reserve and record when leaves, straw or cardboard are added to the active batch.
- Maintain a batch log recording transfer dates, moisture observations, turning and the point at which curing begins.
With the infrastructure established, the next decision is how quickly to process each batch. Hot and cold composting can both produce useful amendments, but they serve different needs and require different levels of management.
Hot Fast Composting vs Cold Slow Composting: Which Produces Superior Nutrient-Rich Results?
Hot composting is generally preferable when speed, pathogen reduction and the treatment of weed seeds are priorities. Cold composting is more suitable for gardeners who want a low-maintenance process, particularly for leaves and woody material. Neither method automatically produces compost with a higher final nutrient concentration: feedstock quality, nutrient retention and maturity remain decisive.
Hot composting relies on a sufficiently large, moist and aerated batch containing enough nitrogen-rich material to support intensive microbial activity. Temperatures rise during the thermophilic stage, accelerating decomposition. Oregon State University Extension identifies approximately 135°F as a useful temperature for reducing pathogens and weed seeds under appropriate conditions.
The pile needs monitoring rather than occasional attention alone. When the temperature begins to fall after approximately five to ten days, turning and rebuilding the pile can expose cooler outer material to the hotter centre. This process also restores airflow. The recommended initial volume of approximately one cubic yard helps the pile retain heat, although the actual outcome depends on its ingredients and management.
Heat treatment has an important limitation: the centre may become hot while outer sections remain cooler. Turning helps distribute exposure, but observing a high temperature at one point does not prove that every particle has received sufficient heat for sanitation. Where pathogen reduction is essential, a validated process with controlled temperature and exposure time is more reliable than casual backyard temperature checks.
Cold composting works at lower temperatures and generally requires less intervention. Leaves, woody fragments and other carbon-rich materials can break down gradually. The process may preserve more of the beneficial fungi and bacteria that would be eliminated by high-temperature composting, although this does not prove that cold compost always has greater microbial diversity or better crop performance.
| Criterion | Hot composting | Cold composting |
|---|---|---|
| Decomposition speed | Faster when conditions are suitable | Slower and gradual |
| Management | Requires monitoring, moisture control and turning | Generally requires less intervention |
| Pathogen and weed-seed reduction | Greater potential when heat exposure is properly managed | Less dependable |
| Microbial preservation | High temperatures reduce some beneficial organisms | Can preserve more heat-sensitive organisms |
| Suitable materials | Balanced mixtures with sufficient nitrogen | Leaves and slowly decomposing woody material |
For a gardener producing compost from mixed vegetable residues, grass clippings and potentially problematic weeds, hot processing offers useful advantages. For a dedicated leaf-mould supply, forcing the material into a hot-composting system is often unnecessary.
A practical hybrid strategy is to begin with a properly managed hot phase when the ingredients and batch size allow it, then transfer the material to a curing bay. During curing, decomposition continues more slowly and the compost stabilises before use. This approach combines accelerated initial processing with a protected resting period, without assuming that curing guarantees a particular microbial composition.
For a broader comparison of practical composting methods, Oregon State University Extension’s composting methods publication explains hot and slow approaches, temperature management, turning and troubleshooting.
The best method is therefore the one that matches the material available and the gardener’s actual management capacity. A consistently managed cold system is more useful than a hot pile that is too small, too dry or repeatedly neglected.
Even an otherwise well-managed composting system can fail if contaminated or persistent materials enter the pile. Ingredient selection is therefore a separate quality-control issue, not simply another part of the brown-to-green calculation.
The Compost Ingredient That Ruins Entire Batches and Spreads Weeds Across Your Garden
Persistent herbicide residues and invasive weeds are two of the most damaging materials that can enter a compost batch. Some herbicides survive both animal digestion and ordinary composting, while weed seeds and persistent roots may remain viable in insufficiently heated piles. Contamination can turn apparently finished compost into a source of damage throughout a vegetable garden.
The particular concern is certain growth-regulator herbicides, including clopyralid and aminopyralid. These substances can remain active in contaminated hay, grass clippings, animal bedding and manure. Their persistence means that the material may look dark, crumbly and completely decomposed while still presenting a chemical risk.
Oregon State University Extension identifies tomatoes, beans, peas, peppers and potatoes among the sensitive crops. Typical symptoms include curled or cupped leaves, distorted new growth and damage around growing points. These symptoms can be confused with other problems, so visual inspection alone cannot establish the cause.
The safest approach is to establish the origin of every significant input. Ask manure suppliers whether animals consumed treated forage, check the source of hay and bedding, and avoid grass clippings from lawns treated with herbicides unless the product label and applicable guidance confirm that composting is appropriate.
Weeds require a different form of caution. Mature seed heads can introduce viable seeds, while invasive plants with persistent rhizomes or roots can regenerate. A cold pile should not be assumed to neutralise either risk. Exclude problematic material unless the composting method is specifically capable of treating it.
Hot composting can reduce weed seeds and pathogens, but temperature alone is not sufficient evidence of complete sanitation. The temperature exposure must be adequate throughout the batch, including the cooler outer material. Oregon State University’s guidance describes approximately 135°F as a useful target, while the EPA identifies 131–160°F as a favourable thermophilic range and explains that pathogen-reduction requirements depend on the method and duration.
When the source of compost or manure is uncertain, a plant bioassay provides a practical screening method. It compares the growth of sensitive seedlings exposed to the suspect material with seedlings grown in uncontaminated potting soil.
The Oregon State University Extension protocol uses the following procedure:
- Prepare a test mixture containing two parts suspect compost and one part clean potting soil by volume.
- Prepare a control using clean potting soil alone.
- Use three pots for each treatment, planting three pea seeds in each pot.
- Grow the seedlings under comparable conditions and water both groups consistently.
- Compare growth when three sets of leaves have developed, generally 14–21 days after germination.
Look for differences in leaf shape, curling, growing points and overall development. If the test plants show characteristic deformation compared with the control, do not distribute the batch across the garden. A negative result only applies to the tested sample and does not prove that unrelated batches are safe.
The Oregon State University Extension publication on herbicide-contaminated compost provides the detailed bioassay method and explains the risks associated with persistent herbicide residues.
Once contamination risks have been addressed, the remaining question is whether the compost has actually finished decomposing. A safe ingredient list does not make an immature batch suitable for seedlings.
When Is Compost Truly Finished and Ready to Use Without Harming Plant Growth?
Compost is ready when it is sufficiently stable and mature for its intended application, not simply when it looks dark. Finished material should generally have an earthy smell, a crumbly texture and no obvious recognisable fresh ingredients. Temperature stability, curing time and plant-growth tests provide additional evidence, particularly when compost will be used around seedlings or in potting mixtures.
Immature compost can continue decomposing after application. Microorganisms may compete with plants for available nitrogen, while incompletely processed material can release compounds that inhibit sensitive growth. High ammonium concentrations can also create ammonia-related toxicity under certain chemical conditions.
Oregon State University Extension makes an important distinction between stability and maturity. Stability describes resistance to further biological decomposition; maturity describes suitability for a particular use. A material can appear stable but still be unsuitable for a sensitive application.
Visual inspection is a useful first test. Mature compost is generally dark, relatively uniform and crumbly, with an earthy smell rather than a sour or ammonia-like odour. Some woody fragments may remain, especially where leaves and small branches were included. Their presence does not automatically mean that the entire batch is immature.
Temperature provides another indication. After active composting, turn the material and observe whether it reheats. If it repeatedly returns to high temperatures, decomposition is probably continuing. If it remains close to ambient temperature without turning, this supports the conclusion that active decomposition has slowed, although it does not independently prove maturity.
For hot composting, Oregon State University Extension recommends an additional four to six weeks of curing after active decomposition, particularly when the material will be used around tender seedlings or vegetable gardens. This is a practical recommendation for that process rather than a universal curing period for every compost recipe.
A germination test provides a further check. Fast-germinating seeds such as cress can be grown in a compost-containing mixture and compared with a control grown in clean growing medium. Poor germination or visibly impaired seedlings indicate that the material may not yet be suitable for sensitive plants. Such a test is a screening method, not a complete chemical or laboratory analysis.
4–6 weeks
The additional curing period recommended by Oregon State University Extension after active hot composting when the material is intended for tender seedlings or vegetable gardens.
Oregon State University Extension, composting methods guidance.
Readiness also depends on the intended application. Seedlings and homemade potting mixes require a particularly mature, stable material because young roots are sensitive to adverse conditions. A slightly less finished compost may be suitable as a surface mulch around established plants, provided it is safe and does not contain persistent contaminants. Material incorporated into a bed should be given adequate time to finish decomposing before sensitive crops are planted.
Laboratory analysis becomes useful when the gardener needs more precise information. Oregon State University Extension reports that stable compost with a carbon-to-nitrogen ratio between 10 and 20 may supply approximately 5% of its total nitrogen as plant-available nitrogen during the first growing season. This illustrates why total nitrogen content should not be confused with immediately available plant nutrition.
For a demanding application, assess the batch using several indicators rather than one attractive characteristic. A dark appearance, low temperature or apparently suitable carbon-to-nitrogen ratio cannot independently establish that compost is mature.
Once compost can be trusted, it becomes more than a finished product: it is a way to return nutrients and organic matter to the place where they originated. That leads to the wider principle of on-site nutrient cycling.
Why Do Self-Sustaining Gardens Compost Everything On-Site Instead of Removing Organic Waste?
Self-sustaining gardens retain suitable organic material because leaves, grass clippings, crop residues and kitchen scraps contain resources that can support future soil fertility. Removing this material exports part of the garden’s organic matter and nutrients. Returning it through composting, mulching and leaf mould production reduces the need to replace those resources with purchased amendments.
Consider what happens when grass clippings are collected and removed every week. The material is no longer available to contribute organic matter or nutrients to the garden. If the gardener subsequently buys compost or another soil amendment, the garden is paying to replace at least part of a resource that was previously removed.
The same principle applies to autumn leaves. Rather than treating them as a disposal problem, store suitable leaves for leaf mould or use them as a carbon-rich compost ingredient. Vegetable residues can return to the composting system, while healthy plant material can sometimes be chopped and left on the soil surface.
However, an on-site cycle does not require every organic material to pass through one large compost heap. Different materials benefit from different processing methods.
- Chop-and-drop mulching: Healthy, suitable plant material is cut into smaller pieces and left on the soil surface.
- Leaf mould: Fallen leaves are collected separately and allowed to decompose slowly into a useful soil conditioner.
- Composting in place: Suitable organic matter decomposes where it will eventually contribute to the growing area.
- Vermicomposting: Worm-based processing can handle suitable kitchen scraps and produce nutrient-rich worm castings.
- Cover crops: Plants grown to protect and improve soil can be cut or incorporated according to the growing system.
Leaf mould deserves particular attention because its function differs from that of nutrient-rich compost. It contributes organic matter and improves water retention and soil structure, rather than acting as a concentrated, immediately available fertiliser. This makes it a valuable component of a diversified fertility strategy.
There are important exceptions to the principle of retaining everything. Diseased plant material, invasive weeds with persistent roots or mature seeds, and potentially contaminated residues should not be added to an ordinary garden compost heap. Persistent herbicide contamination also needs to be considered before recycling manure, hay or grass clippings.
On-site composting can reduce the need to transport and dispose of organic material, while producing an amendment for local garden use. The EPA identifies these as practical benefits of on-site composting. However, the financial and environmental advantage depends on the materials processed, the system’s efficiency and the amendments that would otherwise have been purchased.
Keeping organic matter in the garden is only part of the picture. Different amendments provide different nutrients and physical benefits, which is why well-rotted manure and leaf mould should not be treated as interchangeable products.
Why Does Well-Rotted Manure Feed Plants Faster Than Leaf Mould Despite Both Being Organic?
Well-rotted manure can supply nitrogen and other plant nutrients that become available through further microbial processing, whereas leaf mould primarily improves soil structure, moisture retention and organic matter content. The two amendments therefore perform different jobs: manure contributes more directly to plant nutrition, while leaf mould supports the physical and biological environment in which roots grow.
Manure originates from animal waste and often includes bedding material. Its nutrient composition varies with the animal species, diet, bedding and storage conditions. As manure decomposes, microorganisms transform organic nutrients into forms that can become available to plants. This can make properly matured manure a useful fertility input.
Fresh manure is a different proposition. It may contain high concentrations of readily available nitrogen and salts, and it can introduce pathogens. Applying it directly around sensitive plants can cause damage. The term well-rotted is therefore essential: the material needs appropriate processing and must be suitable for the intended crop and application.
Leaf mould is generally produced from fallen leaves decomposing over a longer period. It is usually relatively low in nitrogen compared with manure. Its value is primarily structural: it contributes organic matter, helps improve moisture retention and supports soil organisms involved in the decomposition of plant residues.
Neither amendment is a complete substitute for the other. A productive vegetable bed may benefit from well-rotted manure where additional nutrients are needed, alongside leaf mould or mature compost to improve the soil’s organic matter and physical condition.
Choosing between the two depends on what the soil actually needs. If plants are growing poorly because the soil lacks available nutrients, leaf mould alone is unlikely to provide the required nutritional input. If the soil is compacted, dries quickly or has poor organic matter content, adding manure without improving its physical condition may not address the underlying problem.
For a more reliable assessment, consider:
- Whether the soil needs additional nutrients or improved structure.
- Whether the manure is fully processed and suitable for the intended crop.
- Whether the leaf mould is sufficiently decomposed for the chosen application.
- Whether existing soil fertility already makes additional nutrient inputs unnecessary.
- Whether a soil test indicates an imbalance that requires a more targeted amendment.
Manure and leaf mould can also be combined with mature compost. The compost supplies a broader mixture of decomposed organic matter, while the other materials address specific fertility and soil-structure requirements. Their proportions should reflect the actual condition of the soil rather than a universal recipe.
Understanding these different functions makes it easier to design a garden that generates its own fertility resources. The final step is to connect the individual composting methods into a complete cycle.
Key decisions before building a self-sustaining fertility system
- Retain suitable organic matter, but recognise that harvesting crops inevitably removes some nutrients from the garden.
- Build a reliable compost supply and diversify production with leaf mould, mulching and suitable compost crops.
- Monitor soil fertility and use targeted external inputs when the garden cannot replace exported nutrients adequately.
How Can You Create a Self-Sustaining Cycle That Eliminates the Need for External Inputs?
A self-sustaining garden links compost production, soil improvement, plant growth and organic waste recovery into one continuous system. Compost returns suitable nutrients and organic matter to growing beds; plants produce new leaves, stems and roots; and those residues become inputs for the next composting cycle. The objective is to reduce external purchases while maintaining productive soil over successive seasons.
The system begins with the composting infrastructure described earlier. Fresh organic material enters the production process, active batches decompose, and mature compost returns to the growing areas. The resulting plant growth generates further residues, which can be composted, mulched or processed separately.
However, complete independence is not automatic. Three constraints deserve attention.
Carbon availability: Autumn often produces substantial quantities of fallen leaves, but a garden needs a dry reserve of carbon-rich material for periods when grass clippings and kitchen scraps dominate. Storing leaves and suitable woody material helps maintain a balanced compost supply throughout the year.
Nitrogen availability: Spring growth can generate substantial green waste, but a garden with insufficient nitrogen-rich inputs may produce slow-decomposing batches. Dedicated compost crops, grass clippings and suitable green residues can help increase the available nitrogen supply.
Nutrient export: Harvested vegetables, fruit and other crops carry nutrients away when they leave the garden. Returning crop residues helps, but it cannot completely replace nutrients removed in harvested produce. This is the fundamental limit of a closed-loop system.
Plants such as comfrey can be grown specifically to generate biomass for mulching or composting. Cover crops can also contribute organic matter and help protect the soil between main crops. Their use should be planned around available growing space and the nutritional needs of the garden rather than treated as a universal solution.
A gradual transition is more reliable than attempting complete self-sufficiency immediately.
- Stop unnecessary organic-waste exports. Retain suitable grass clippings, leaves and healthy crop residues.
- Establish a dependable compost system. Separate fresh inputs, active decomposition and curing material.
- Add complementary organic-matter systems. Create dedicated leaf-mould storage and use appropriate surface mulching.
- Grow dedicated fertility resources. Introduce suitable compost crops and cover crops where space allows.
- Monitor soil fertility. Assess soil condition and nutrient requirements, then replace any genuine deficits with appropriate inputs.
The most useful measure of success is not the number of purchased products eliminated. It is whether the garden maintains healthy soil, productive crops and a dependable supply of suitable organic matter over time.
Where nutrients are exported in harvested produce, some replacement may remain necessary. Appropriate external inputs, including responsibly sourced organic materials, can therefore form part of a well-managed system without undermining its sustainability.
Human-derived materials should never be treated as ordinary garden waste: any use requires appropriate sanitation, legal compliance and safeguards against pathogen and chemical contamination.
For gardeners seeking greater independence, the practical objective is a system that reduces avoidable losses, recycles suitable materials and identifies genuine nutrient deficits rather than assuming that all external inputs can disappear.
Start by retaining suitable garden waste and producing one carefully managed batch. Once its quality and maturity are consistent, expand into leaf mould, dedicated compost crops and soil monitoring. A self-sustaining garden develops through repeated, measurable improvements rather than a single composting project.
Is homemade compost always better than commercial bagged compost?
No. Homemade compost offers greater control over ingredients, processing and maturity, but its nutrient content depends on the materials used and the quality of management. Commercial products also vary. Oregon State University Extension recommends assessing compost through factors such as nutrient analysis, stability and maturity rather than assuming that one source is automatically superior.
How long does it take to produce high-quality homemade compost?
It depends on the composting method, materials, temperature and management. Hot composting can accelerate active decomposition, but it still needs an appropriate curing period. Oregon State University Extension recommends an additional four to six weeks of curing after active hot composting when the material is intended for tender seedlings and vegetable gardens. Cold composting generally takes longer.
Can grass clippings be used as the main ingredient in compost?
Grass clippings are useful nitrogen-rich ingredients, but relying on them alone can create a wet, compacted and poorly aerated pile. Combine them with carbon-rich browns such as dry leaves, straw and shredded untreated cardboard. Avoid clippings from treated lawns if persistent herbicide contamination is possible.
Can unfinished compost be used as mulch?
Some partially decomposed organic material can be used as surface mulch, provided it is free from contaminants, invasive weeds and unsuitable ingredients. However, immature compost should not be assumed suitable for seedlings, potting mixes or direct incorporation before planting. Material that continues decomposing may compete for nitrogen or release compounds that inhibit plant growth.
How can gardeners tell whether compost contains persistent herbicides?
Appearance and smell cannot reliably detect persistent herbicide residues. A pea bioassay can screen suspect compost by comparing seedlings grown in a mixture of two parts compost and one part clean potting soil against seedlings grown in clean potting soil alone. Compare growth when three sets of leaves appear, generally 14–21 days after germination. Distorted growth may indicate contamination, although a negative result only applies to the sample tested.