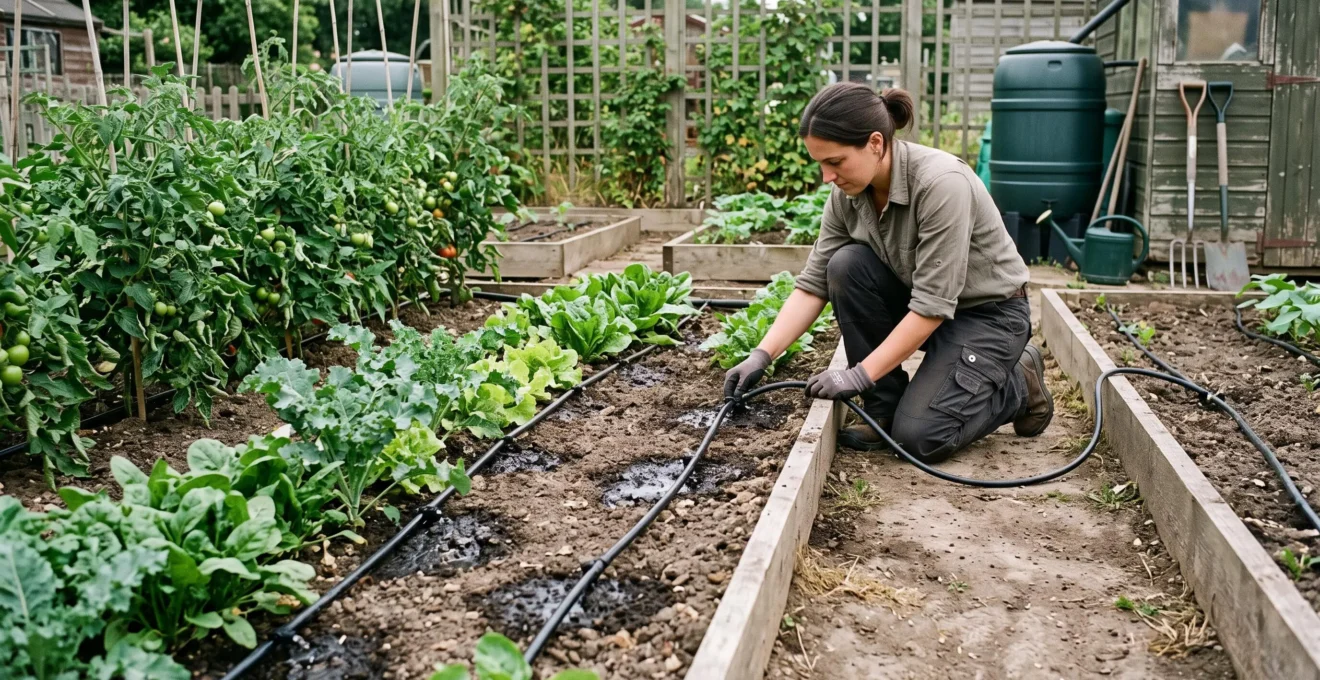
A sprinkler can make an entire vegetable bed look thoroughly watered while leaving much of that water outside the plants’ effective root zones. Drip irrigation takes a different approach: it releases measured amounts directly into the soil where roots can absorb them, reducing evaporation, overspray and runoff.
Can that difference reduce water consumption by 60%? It is possible under favourable conditions, but 60% is not a universal or guaranteed result. The US Environmental Protection Agency reports that microirrigation systems typically use 20–50% less water than conventional sprinklers. University of Georgia Cooperative Extension describes savings of up to 75% for home vegetable gardens, although its published figure is not supported by an identifiable controlled comparison in the cited guidance.
For UK gardeners facing rising water bills, dry summers or hosepipe restrictions, the practical objective is more important than achieving a particular percentage: deliver enough water to active roots without unnecessarily wetting leaves, pathways or already moist soil. Correct system design, emitter placement and watering frequency determine whether those savings become reality.
Drip irrigation: essential points
- Root-zone delivery can substantially reduce water use compared with overhead sprinklers, but savings vary with soil, weather, equipment and scheduling.
- Keeping tomato foliage dry can reduce conditions favourable to fungal diseases, although a precise 70% reduction in blight is not established.
- Correct emitter positioning, adequate wetting depth and rainfall-responsive watering matter more than simply installing drip tubing.
- Why Do Drip-Irrigated Tomatoes Suffer Far Less Blight Than Overhead-Watered Plants?
- How to Design and Install a Drip Irrigation System for a 50m² Vegetable Garden?
- Automatic Timers vs Manual Drip Systems: Which Suits Variable UK Weather Patterns Better?
- The Emitter Placement Error That Leaves Plants Thirsty Despite Running Irrigation Daily
- When Should You Install Drip Irrigation to Minimise Root Disturbance in Existing Gardens?
- The Watering Frequency Mistake That Creates Shallow Roots and Drought-Vulnerable Plants
- The Summer Watering Timing Mistake That Wastes Water and Stresses Plants Further
- How Does Maintaining Ideal Soil Moisture Prevent Both Drought Stress and Root Rot Simultaneously?
Why Do Drip-Irrigated Tomatoes Suffer Far Less Blight Than Overhead-Watered Plants?
Drip-irrigated tomatoes can experience less foliar disease because irrigation water reaches the soil without repeatedly wetting the leaves. Overhead sprinklers prolong leaf wetness and can splash pathogen-contaminated soil onto lower foliage. However, the frequently suggested 70% reduction in tomato blight is not established by the supplied evidence; actual disease differences depend on weather, pathogen pressure and cultivation practices.
Tomato diseases do not arise simply because plants receive plenty of water. The critical distinction is where that water lands and how long foliage remains wet.
Early blight can produce spots on lower tomato leaves, while late blight can spread rapidly under suitable cool, humid conditions. Leaf wetness is important to the infection processes of many fungal and fungus-like pathogens. Repeated overhead irrigation can create favourable conditions that drip irrigation largely avoids.
Sprinkler droplets may also strike contaminated soil and carry pathogens onto susceptible foliage. This is particularly relevant where lower leaves hang close to the ground.
The University of Minnesota Extension‘s tomato-growing recommendations advise avoiding overhead sprinkling because wet leaves are more susceptible to disease and splashed soil can carry spores.
Drip irrigation addresses both exposure pathways. Water enters the soil beneath the canopy rather than being sprayed across it, leaving foliage relatively dry unless rain, condensation or other moisture sources intervene.
However, drip irrigation cannot eliminate tomato blight. Rainfall, high humidity, poor air circulation, infected plant material and susceptible varieties remain important. A tightly planted tomato bed may retain moisture around its foliage regardless of irrigation method.
Look for recurring symptoms after overhead watering: new spotting on lower leaves, prolonged dampness within dense foliage or disease development during humid periods following repeated evening irrigation. These patterns suggest a possible contribution from irrigation, not a definitive diagnosis.
Reducing disease pressure can also protect the garden’s water investment. A healthy plant that reaches harvest avoids some of the wasted irrigation associated with failed crops and replacement planting. That indirect benefit is plausible, but it should not be counted as a separately proven percentage of water savings.
The next step is to design a system that delivers water accurately without creating new problems through poor pressure regulation, uneven distribution or excessive irrigation.
How to Design and Install a Drip Irrigation System for a 50m² Vegetable Garden?
A 50m² vegetable garden needs a drip system organised around crop requirements rather than a single uniform watering pattern. Divide the plot into compatible watering zones, select dripline or individual emitters for each planting arrangement, and connect them through suitable filtration and pressure control. Check the available water supply before choosing emitter quantities so every planting area receives adequate flow.
Begin with a simple sketch showing raised beds, planting rows, water access and the crops grown in each section. Separate plants with different moisture needs wherever independent watering is practical.
For example, leafy vegetables may require more consistently moist soil, while established tomatoes, beans and squash can often tolerate longer intervals between suitably deep irrigation sessions. Seedlings form another category because their immature roots occupy a smaller soil volume.
A practical system contains these components:
- Water source: an outdoor tap or suitably configured rainwater butt.
- Filter: prevents sediment and debris from blocking narrow emitters.
- Pressure regulator: reduces excessive supply pressure when required by the selected equipment.
- Mainline: carries water from the source to the planting areas.
- Branch tubing and emitters: distribute water into individual beds or root zones.
- End caps or flushable ends: close the lines while allowing maintenance.
The University of Georgia’s vegetable garden drip irrigation circular explains the importance of filtration, pressure reduction, supply capacity and dividing installations into zones where the available flow is insufficient.
Bed arrangement determines the distribution method. Closely spaced crops in continuous rows are generally suited to drip tape or dripline with regularly spaced outlets. Individual emitters offer greater flexibility around widely spaced tomatoes, courgettes and other large plants.
For a UK rainwater butt, pressure is the main limitation. Gravity provides relatively little pressure when the water surface is only modestly above the emitters. Raising the butt increases available head, but no universal minimum height can be specified without the emitters’ operating requirements and the system’s pipe losses.
Choose equipment explicitly rated for gravity-fed operation if avoiding a pump. Conventional pressure-compensating emitters may require more pressure than a typical raised butt can supply. A pressure regulator cannot increase insufficient gravity pressure; a suitable pump may be necessary.
For mains-fed systems, match the regulator to the tubing and emitter specifications. A regulated supply still needs enough flow to serve the complete zone. Where applicable, follow UK water-supply backflow protection requirements and check any current hosepipe restrictions before connecting or operating the equipment.
Check capacity using the combined rated output of all emitters operating simultaneously. Compare that figure with the water source’s usable flow at the pressure required by the components. As a separate measurement, a tap’s approximate unrestricted flow can be assessed with a container and stopwatch, but that measurement alone does not establish operating flow through a regulated drip system.
Five checks before your first irrigation cycle
- Sketch every bed and its crop group; produce a labelled 50m² layout showing separate watering zones.
- Mark dripline runs or individual emitter locations; produce an emitter-position plan covering each planting row.
- Record each component’s specified operating pressure and flow; produce a compatibility list for the water source.
- Add the rated outputs of simultaneously operating emitters and test the source; record whether each zone can be supplied adequately.
- Run the completed system, inspect every connection and check soil moisture beneath representative emitters; record leaks, dry patches and required adjustments.
Once water reaches each zone reliably, the biggest remaining design decision is how to control delivery during Britain’s unpredictable periods of rain and drought.
Automatic Timers vs Manual Drip Systems: Which Suits Variable UK Weather Patterns Better?
Automatic drip timers suit gardeners who need dependable watering during holidays or prolonged dry periods, while manual systems offer greater flexibility for gardeners who regularly inspect their beds. In variable UK weather, neither approach is automatically more water-efficient. A timer that ignores rainfall can waste water, whereas a carefully monitored manual system may use less.
The key distinction is between consistent operation and responsive operation. Automatic delivery solves forgetfulness, but efficient delivery also requires knowing when the soil actually needs water.
A basic timer can continue irrigating through a wet week because it follows a programmed schedule rather than current soil conditions. Conversely, manual watering may be missed during a sudden hot spell or when its operator is away.
Additional controls bridge this gap. Rain sensors can interrupt watering after rainfall, soil-moisture sensors respond to conditions at the measured location, and compatible smart controllers offer more flexible scheduling. Their effectiveness still depends on installation, settings and reliable operation.
Compare the available approaches before deciding:
| Control method | Advantages | Main limitations |
|---|---|---|
| Manual valve | Low equipment complexity; decisions can reflect observed weather and soil conditions | Requires frequent attention; sessions may be forgotten |
| Basic battery timer | Repeatable watering during absences; comparatively straightforward setup | May irrigate unnecessarily after rain; depends on batteries and valve operation |
| Timer with rain sensor | Can skip watering after qualifying rainfall | Rainfall detection does not directly measure root-zone moisture |
| Soil-moisture-controlled system | Can respond to conditions within the monitored soil zone | Sensor position, calibration and compatibility affect reliability |
| Bluetooth or Wi-Fi controller | Flexible programming and, on supported models, remote adjustment or weather-responsive functions | Higher complexity; certain features depend on connectivity, power or subscriptions |
For a gardener who checks a small vegetable plot daily, a manual valve can provide adequate control without extra electronics. A basic timer becomes more attractive when watering must continue during regular absences.
For a home garden with frequent weather changes, a moisture-aware controller may prevent unnecessary operation, provided the sensor represents the relevant root zone. An allotment without reliable power or connectivity may be better served by simpler equipment and a dependable watering arrangement.
Whatever the control method, inspect the system periodically. Flat batteries, blocked emitters, stuck valves and disconnected tubing can leave plants dry even when a controller appears correctly programmed. Manual arrangements introduce a different failure risk: nobody opens the valve during a critical dry spell.
Even a dependable controller cannot compensate for poor emitter placement. A perfectly timed cycle still fails if the water consistently misses the most active parts of the root system.
The Emitter Placement Error That Leaves Plants Thirsty Despite Running Irrigation Daily
Placing every drip emitter immediately against the plant stem can concentrate water in a small soil volume while leaving spreading feeder roots inadequately supplied. The problem becomes more significant as plants mature and their root systems expand. Efficient drip irrigation therefore requires emitter positions that match root distribution, soil wetting patterns and the changing size of each crop.
A drip emitter does not wet an unlimited area. Water spreads downward and sideways according to soil texture, structure, initial moisture and application rate. The resulting wetted soil bulb may be narrow in freely draining soil or spread differently through finer-textured ground.
If a single emitter produces only a small wet patch next to a mature tomato stem, the outer root zone can remain dry. The gardener sees damp soil directly beneath the outlet and assumes the entire plant is adequately watered.
For widely spaced crops such as tomatoes and squash, distribute emitters around the active root area rather than relying on one fixed point. For mature plants, this may mean additional outlets or moving adjustable emitters farther from the stem as the canopy develops.
For dense rows of carrots, salads or similar crops, continuous dripline often provides more appropriate coverage than widely separated point emitters.
Do not interpret the outer edge of the foliage as an exact underground root boundary. It provides a useful visual reference, but roots extend differently according to species, growing conditions and barriers within the soil.
A simple inspection reveals more than watching the tubing. After a normal watering cycle, gently open a small section of soil beside a representative emitter using a hand trowel. Observe where the damp soil ends, both sideways and downward.
If moisture extends only a short distance from the outlet while nearby root-bearing soil remains dry, adjust the emitter layout or irrigation duration and check again. Avoid digging directly through substantial roots, especially around established crops.
This inspection can be started in five minutes, although determining the full wetting pattern and comparing multiple locations may take longer. It is particularly useful when plants appear stressed despite scheduled irrigation.
Repeat the assessment as vigorous crops expand. An emitter arrangement that adequately watered young transplants may not cover the same proportion of their root zones later in summer.
Correcting emitter position often improves distribution without increasing the total amount of water applied. For established gardens, however, the adjustment should also minimise unnecessary disturbance to living roots.
When Should You Install Drip Irrigation to Minimise Root Disturbance in Existing Gardens?
Install drip irrigation during bed preparation or planting whenever possible, because tubing can then be arranged before extensive root systems develop. In established beds, surface-laid lines secured with suitable pins usually require less soil disturbance than buried pipes. For mature shrubs and perennial plantings, relatively dormant periods can offer a practical opportunity to modify irrigation without disrupting active growth.
Early spring is often a convenient installation period in UK vegetable gardens. Beds are being prepared, crop positions are known and dripline can be arranged before seedlings and transplants occupy the soil.
Existing gardens require a different approach. Rather than trenching through established root systems, place flexible tubing on the surface and secure it without driving pins through large roots.
Surface installation preserves flexibility. Lines can be inspected, cleaned or moved as crop rotations change. Buried tubing is less visible and may offer some protection from accidental surface damage, but repositioning it can disturb roots and soil structure.
Subsurface installations also introduce considerations such as root intrusion, emitter accessibility and the suitability of the equipment for burial. Ordinary above-ground dripline should not automatically be treated as suitable for permanent underground use.
For established trees and shrubs, arrange watering outlets across the active root zone rather than concentrating everything against the trunk. A broad distribution pattern is often more useful than a single deeply watered spot.
Where possible, make substantial changes around mature deciduous plants during dormancy, when the garden is generally easier to access and disturbance to active growth may be reduced. Avoid assuming that every evergreen or perennial has the same dormant period.
Extremely dry, compacted ground presents another challenge. Digging through hard soil can break fine roots and disturb soil aggregates. Installing surface lines after rainfall or gently moistening the ground beforehand may make careful positioning easier.
However, saturated ground is also unsuitable for unnecessary trampling or digging because wet soil is vulnerable to compaction and structural damage.
Once the system is installed without significant root damage, effective watering depends less on the presence of tubing than on whether each irrigation cycle encourages healthy root development.
The Watering Frequency Mistake That Creates Shallow Roots and Drought-Vulnerable Plants
Repeated light watering can keep only the upper soil layer moist, encouraging roots to remain concentrated near the surface rather than exploring deeper ground. These plants may become more vulnerable during hot, dry weather. For many established vegetables, drip irrigation works better when sessions sufficiently wet the active root zone and are followed by intervals determined by actual soil moisture.
The paradox is that an efficient irrigation method can produce inefficient plants when scheduled incorrectly. Drip tubing may prevent overspray while a poorly chosen daily programme keeps roots dependent on a continuously damp surface layer.
The University of Minnesota’s tomato guidance identifies shallow watering as a contributor to shallow root development and increased vulnerability to drought and hot weather.
That does not mean all plants should receive infrequent watering. Root depth and growth stage determine the appropriate schedule.
Seedlings and recently germinated crops have limited root systems and may need frequent, gentle moisture replenishment close to the surface. Lettuce, spinach and other crops requiring consistently moist conditions may also need shorter intervals during warm weather.
Established tomatoes, beans and squash can often benefit from more thorough irrigation that reaches their developing root zones, rather than repeated superficial applications.
To assess the outcome of a cycle, inspect soil beneath the surface. For established borders, the Royal Horticultural Society describes checking moisture around 15cm deep; young trees and shrubs may require water to penetrate approximately 20–30cm.
These are practical reference points, not universal depth targets for every vegetable or growth stage.
A finger test can reveal whether the upper soil is dry, while a trowel or suitable soil probe provides information deeper down. A screwdriver may also help identify changes in soil resistance, although stones and compaction can complicate interpretation.
Adjust watering duration until moisture reaches the relevant root zone, then allow an appropriate interval before the next cycle. The interval will shorten during sustained dry weather and lengthen after meaningful rainfall.
Avoid deliberately allowing severe drought stress. Tomatoes during fruit development, in particular, benefit from reasonably consistent moisture because substantial fluctuations can contribute to poor fruit quality and blossom-end rot.
Over time, healthy root development may help established crops tolerate longer gaps between irrigation sessions. Whether that reduces total water consumption depends on plant demand and environmental conditions; fewer sessions alone do not guarantee lower overall use.
Having established the right wetting depth and interval, schedule water delivery when plants can use it effectively and unnecessary atmospheric losses are minimised.
The Summer Watering Timing Mistake That Wastes Water and Stresses Plants Further
Watering during the hottest part of a summer day can increase evaporative losses, particularly when overhead sprinklers disperse water across exposed leaves and soil. Drip irrigation generally reduces those losses by applying water close to the ground, but timing still matters. Early morning is usually a practical choice because evaporation is relatively low and plants can absorb moisture before daytime heat.
Midday watering is not equally wasteful under every system. Overhead spray can evaporate or drift away before reaching the intended area, with losses influenced by temperature, humidity, wind and droplet size.
Drip irrigation avoids much of that exposure, although water near the soil surface can still evaporate, especially when the ground is bare and hot.
The Royal Horticultural Society watering advice recommends early morning as the preferred watering period, applying water to soil instead of foliage and adapting frequency to rainfall, crop development and soil conditions.
Evening watering is another option, particularly with drip systems that avoid leaf wetting. However, any foliage left damp overnight may remain favourable to fungal disease development for longer than foliage watered early in the day.
There is also a common misinterpretation of summer wilting. Some plants temporarily droop during hot afternoons because water loss through transpiration exceeds their short-term capacity to replace it. They may recover as conditions cool.
Before running an additional irrigation cycle, check whether the root-zone soil is actually dry. Adding water to already moist soil may provide little benefit and could increase waterlogging risk.
Drip delivery can also exceed the soil’s local infiltration capacity. Very dry, compacted or poorly structured ground may initially absorb water slowly, causing local pooling or surface movement away from the emitter.
In these circumstances, splitting one long irrigation session into shorter cycles with pauses can provide time for infiltration. Observe whether runoff actually occurs before adopting this approach, since unnecessary repeated cycles may simply complicate scheduling.
The objective is to match water delivery to the soil’s absorption capacity, not to maximise the number of times a valve opens.
Summer scheduling should remain flexible. An extended dry period may require more water, but a rainy week should prompt reassessment rather than continued automatic operation.
Timing, duration and emitter location ultimately serve one common goal: keeping enough moisture available for plant growth without depriving roots of the oxygen they also need.
Key takeaways before adjusting your irrigation schedule
- Measure moisture below the surface instead of judging irrigation success from a damp patch beside the stem.
- Match each watering cycle to the plant’s active root depth and the soil’s ability to absorb water.
- Reduce unnecessary irrigation after rainfall while preventing prolonged saturation around vulnerable roots.
How Does Maintaining Ideal Soil Moisture Prevent Both Drought Stress and Root Rot Simultaneously?
Maintaining suitable soil moisture prevents drought stress by keeping water available for absorption while reducing root-rot risk by preserving oxygen within soil pores. Drip irrigation supports this balance through slow, targeted application. However, it cannot correct poor drainage or inappropriate scheduling by itself. Healthy soil structure, suitable irrigation intervals and regular moisture checks are essential to avoiding both extremes.
Roots require water and oxygen simultaneously. When soil dries excessively, plants struggle to absorb enough moisture to sustain normal growth and leaf function.
At the opposite extreme, persistent saturation fills air spaces within the soil with water. Oxygen movement becomes restricted, root functioning deteriorates and conditions may favour organisms associated with root disease.
This explains why more water is not always better. A plant showing yellowing leaves or wilting may be suffering from either insufficient water or poorly functioning roots in waterlogged ground.
Drip irrigation offers a practical advantage because water can be delivered in measured quantities to selected parts of the root zone. It avoids saturating an entire bed unnecessarily, provided the system is correctly designed and switched off at the appropriate time.
Soil characteristics strongly influence the result. Sandy soils generally drain relatively quickly and may require closer monitoring during dry periods. Heavier soils can retain water longer, making over-irrigation a concern when gardeners apply the same schedule everywhere.
Organic matter and sound soil structure improve moisture management by supporting water retention, infiltration and drainage, although their effects depend on soil type and existing conditions.
Several practical checks help identify a suitable moisture range:
- Soil squeeze test: take a small sample from the relevant depth. Soil that forms a loose shape and then crumbles can suggest workable moisture, although the result varies substantially with soil texture.
- Wetting-depth inspection: use a trowel after irrigation to confirm that moisture reaches the intended root zone without remaining concentrated only at the surface.
- Moisture meter: use readings to follow trends at consistent locations, remembering that inexpensive meters may provide approximate rather than precise measurements.
- Tensiometer: where more detailed monitoring is justified, measure soil-water tension using a correctly installed and maintained instrument.
No single moisture reading establishes an ideal condition for all vegetables. Soil texture, crop species, root development and seasonal weather change the point at which irrigation is beneficial.
Improving the soil can make the system more forgiving. Compost-rich, well-structured ground may retain useful water between irrigation sessions while allowing excess moisture to move through appropriately drained profiles.
Mulch can further reduce evaporation from exposed soil, particularly during warm and windy conditions. Keep distribution lines accessible enough to detect leaks, blockages and damage.
The strongest conservation results therefore come from combining precision delivery with attentive soil management. The EPA’s 20–50% savings range offers a useful comparison with conventional sprinklers, while the larger figure reported by University of Georgia Extension illustrates why the exact outcome should not be assumed for every UK garden.
Start with one representative vegetable bed: inspect its moisture depth after the next irrigation cycle, adjust emitter placement or runtime only where needed, and compare water use over subsequent cycles under similar conditions. That measured approach is more dependable than aiming blindly for a 60% reduction.
Can drip irrigation legally be used during a UK hosepipe ban?
Do not assume that drip irrigation is exempt from a temporary use ban. Restrictions can depend on the relevant water undertaker, the prohibited activity and any applicable exceptions. Check the current notice issued by your water supplier before using mains water for garden irrigation. Harvested rainwater may offer an alternative, subject to the circumstances and applicable restrictions.
Can a drip irrigation system run entirely from a rainwater butt without electricity?
Yes, if the system uses gravity-compatible components and has sufficient height difference, available water volume and flow capacity. Not every drip emitter works reliably at low pressure. Check the manufacturer’s specifications before installation; a pump may be needed where gravity alone cannot supply the required operating pressure.
How can gardeners measure whether drip irrigation actually saves water?
Record the volume used by each watering method over comparable periods, ideally using a suitable water meter or measured reservoir output. Compare similar planted areas with comparable crops, rainfall and soil conditions. A percentage saving is meaningful only when irrigation delivers adequate water to the plants in both cases and the comparison accounts for changing weather.
Should drip irrigation tubing be removed during winter?
Follow the manufacturer’s winter maintenance guidance. Drain susceptible components before freezing conditions, protect timers and other equipment that should not remain exposed, and inspect the system before restarting in spring. Removable surface tubing may be stored or left in place according to its material, exposure and intended use.
Is drip irrigation suitable for raised beds as well as traditional vegetable plots?
Yes. Raised beds can use short dripline sections, flexible tubing and individual emitters. Their limited soil volume and drainage characteristics make monitoring especially important. Arrange outlets to cover the planted root zones, then check moisture distribution rather than assuming that every part of the bed receives an equal amount.